Back
Back
 Pixomatic Team
Investing energy into creating good Instagram stories is one way to drive up your engagement and enhance your brand's presence. There are built-in tools on Instagram that you could use to draw, add text, stickers, and even gifs. However, competition on this popular photo and video platform is fierce, and you need to do everything in your power to stand out.
Pixomatic, a photo editing app and online photo editor, has features that will upgrade your Instagram story game. This blog will guide you through Pixomatic's killer tools that will help you make unique Instagram stories!
First things first, you have to get a grip on Pixomatic's tools that we will use for this tutorial.
Pixomatic's crop tool allows you to crop your image manually or to a specific aspect ratio. To adjust the size of your image, you should click on Crop, then choose 9:16, which is the aspect ratio of Instagram stories.
Pixomatic offers five types of brushes and a complete color palette. The Draw tool allows you to adjust the opacity of your drawing by dragging the Opacity slider to the left or the right.
With more than 40 fonts and a range of colors, Pixomatic's text tool exceeds your expectations. You can outline your text, add a shadow to it, and even change the position of the shadow and blur it. Pixomatic's text tool is always a step ahead. You will have fun playing around with it and creating unique edits!
Use Pixomatic's cut tool to create cutouts to remove or change the background. After saving the cutout, you can use it as a sticker and add it to another image. The cool part about this tool is that you can design unique stickers by outlining them. Suppose you want to post a picture of a sleepover with your friends, why not add a sticker of the pizza you had for dinner? Customizing your stories to the maximum will definitely make you stand out.
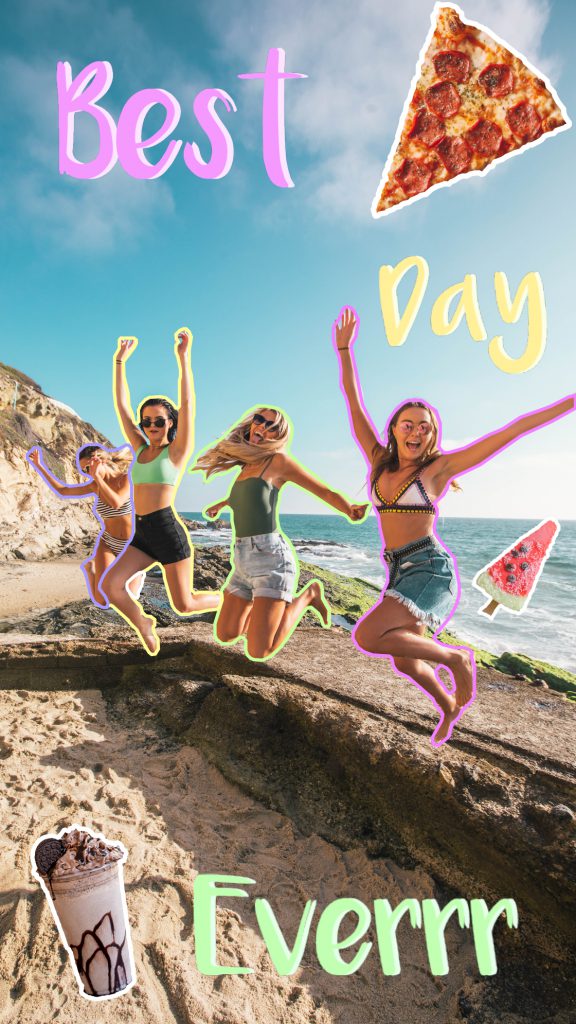
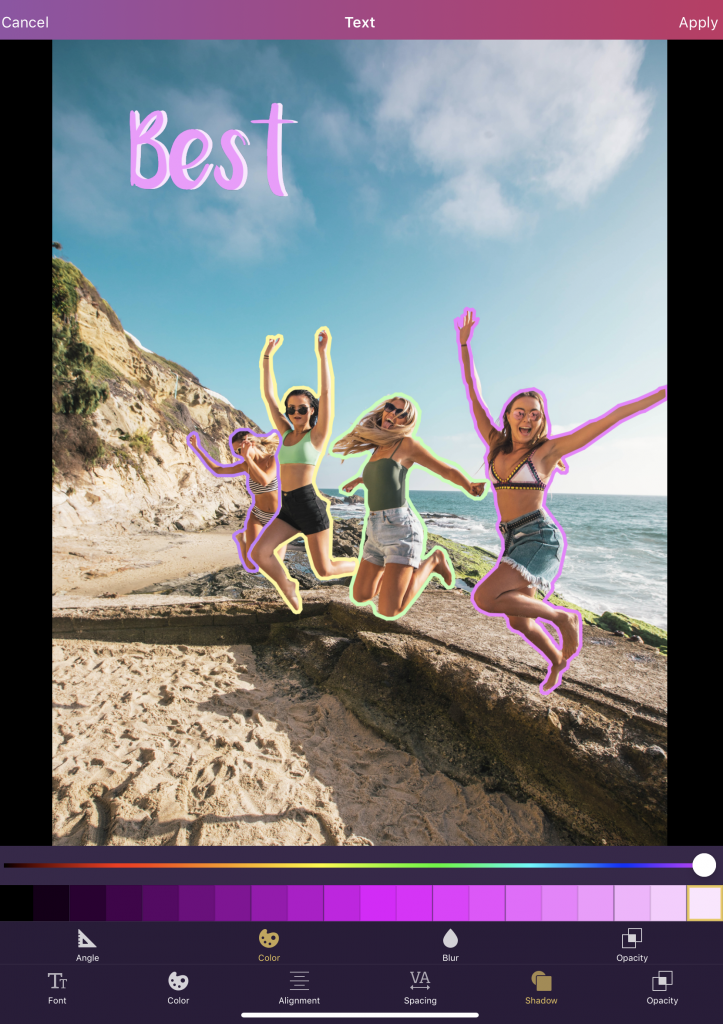
This edit takes a bit of effort, but it's worth it! Remember the collage diaries we used to keep when we were younger? This Instagram story gives me throwback vibes in the best way possible.
To create this edit, follow the steps below!
First, we need to create a cutout for each subject. To do that, select the cut tool, and adjust the brush size by dragging the slider to the left or right. Now, outline the subjects one by one. You should get four layers that contain a cutout each.
![]()
Once you finish outlining a subject, click Next. If part of the subject is missing, click on fill to brush over the missing area to include it in the cutout. If, on the contrary, the cutout includes extra elements, click on erase to remove them. Once you're done, click on Apply.
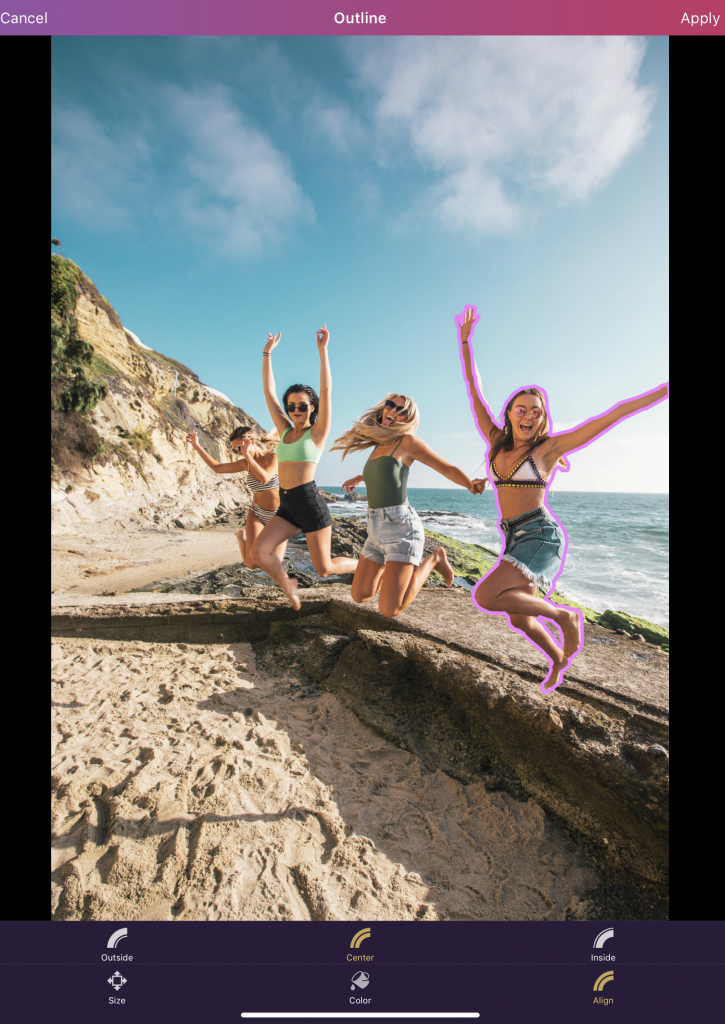
We now have four cutouts. Let's outline them to make them look more fun. To do that, click on the outline tool. You can choose the color you want and align the outline outside, at the center, or inside the cutout. Outline each subject with a different color.
You can do so many things with Pixomatic's text tool! For this edit, I went with a simple text in order not to overcrowd the image. Each word has been written separately, meaning each word is located in a separate layer.
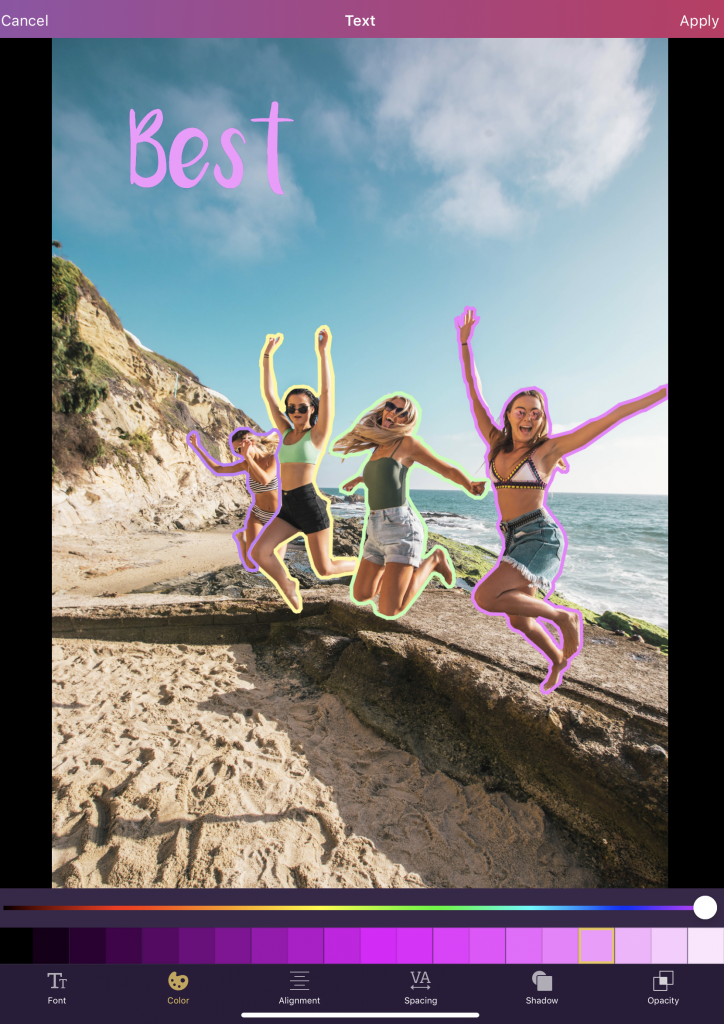
Click on Text, write a word, and choose the font Luna. Pick your favorite color; make sure it matches the image's mood. Since this picture was taken on the beach, I used a fun color combination. However, if the image you're using was taken in winter, it's better if you use calm colors like blue and lilac.
For the final touch, I added a shadow to all the texts. To do that, click on Shadow. When you're done, hit Apply. Easy peasy lemon squeezy!
I created the food stickers the same way I outlined the subjects. However, since they are not parts of the image, the process of creating them requires additional steps.
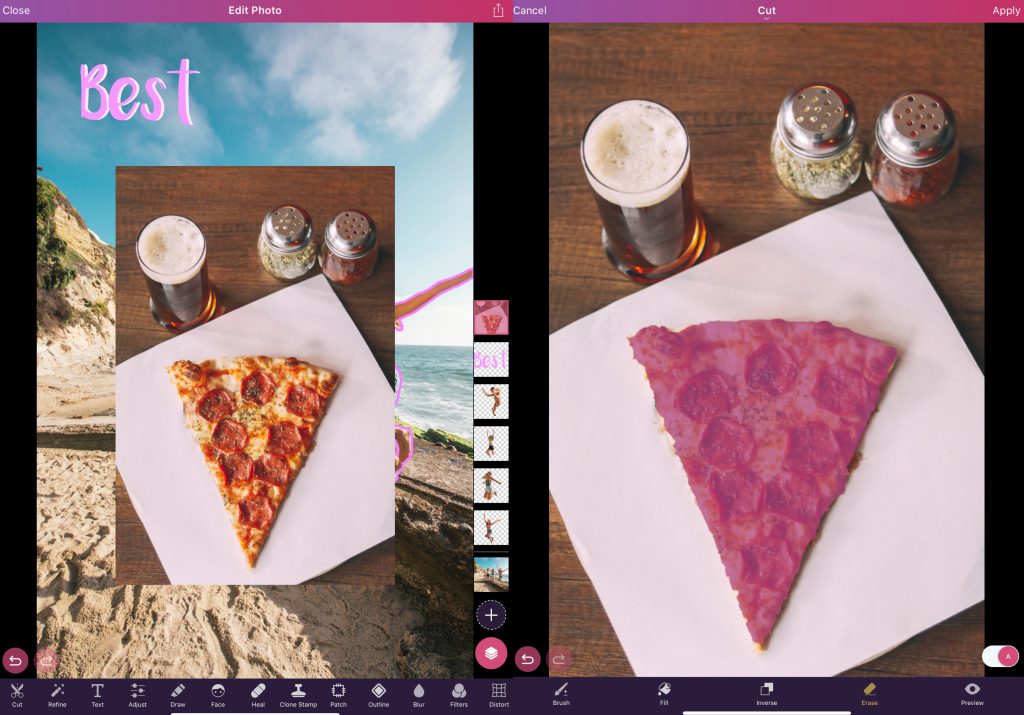
To create stickers, click on the plus icon, and select Image Layer. Choose an image, select the cut tool, and create a cutout of any item you want to add in your Instagram story.
Next, outline it. Since the image contains many colors, I went with a white outline for the food stickers, but you're free to choose any color you want.
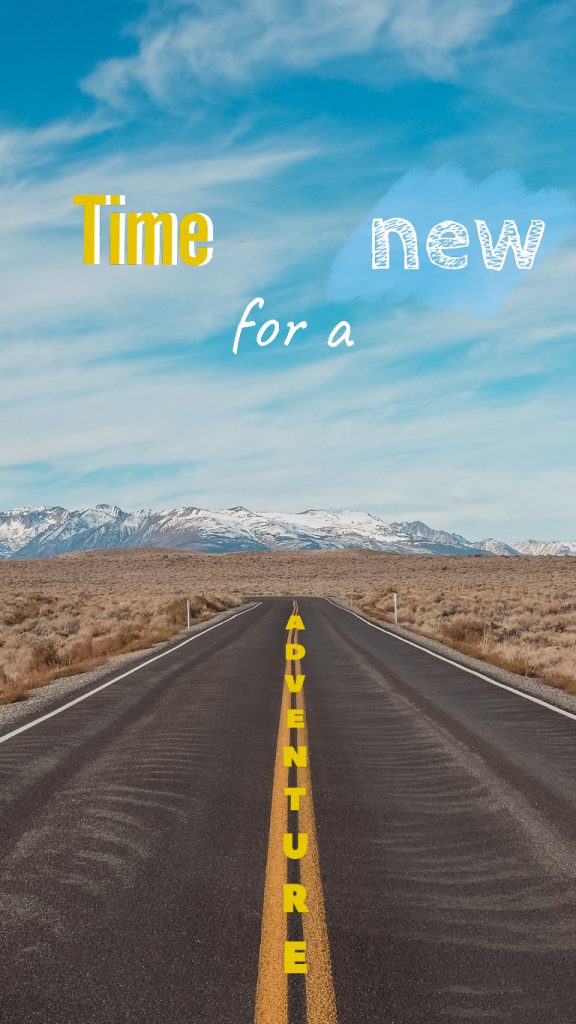
People love exciting and fresh content, so make sure to document your road trips on Instagram. This edit is as simple as the previous one, but it contains a secret ingredient: the perspective effect. Before we get into that, check out the fonts that I used to create this Instagram story.
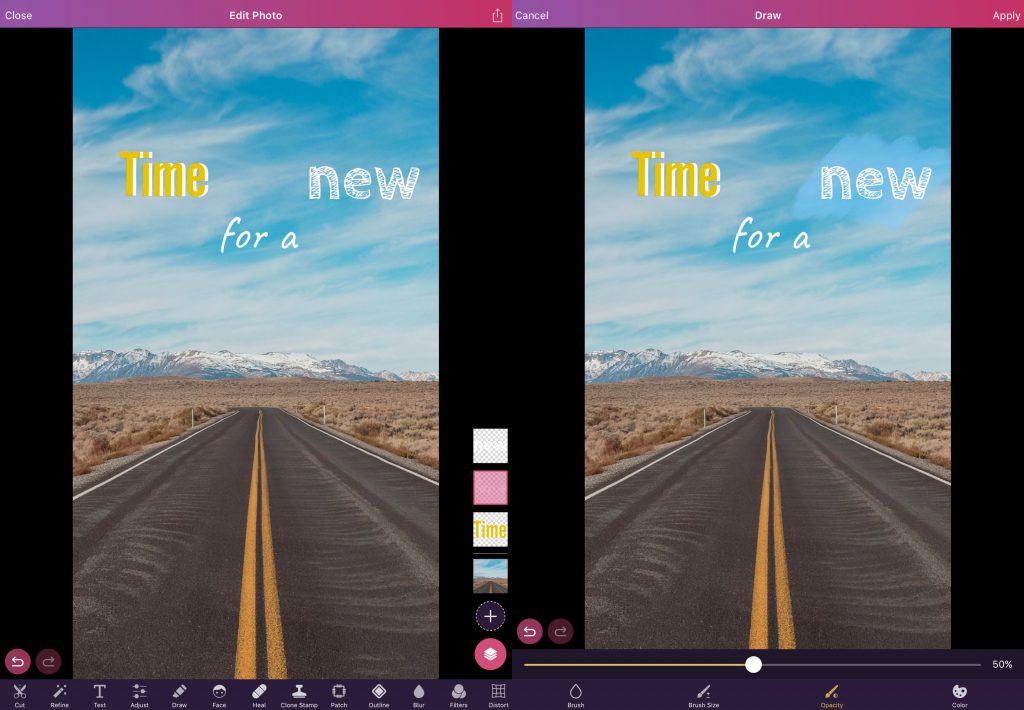
Choose a different color for each word. You can also highlight words using any of the brushes from the Draw feature. For this edit, I highlighted the word “new” with Brush 4.
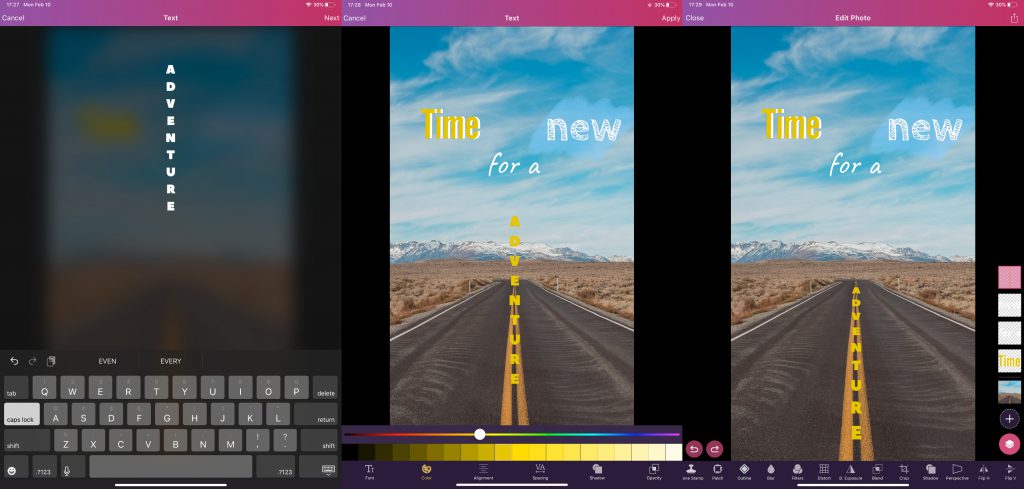
As for the word “adventure,” you might have noticed that it is positioned differently than the other words. To create this effect, you will need to use the Perspective feature. After you click on Perspective, select Rotate V. and drag the slider to the right to rotate it upwards, or drag it to the right to rotate the text downwards. Positioning the text as such will give the image a 3D effect.
Now it's your turn to try!