Back
Back
 Pixomatic Team
When life gives you lemons, you turn them into cool digital collages. After a long gloomy winter, the weather is finally sunny, and I thought it would be fun to teach you how to make digital collages that are as fresh as a cold glass of lemonade.
Collages are one of the ways you can express your creativity and create an alternate dimension where things do not have to make sense. For this blog post, I decided to create a collage where a slice of lime acts as a halo. Pretty neat, right?
What I love about collages is that there is no right or wrong way of doing it! Pixomatic’s background eraser tools, also known as the Magic Cut and Cut tools, make collage-crafting so easy! And Magic Cut is the main tool we will be using for the following tutorial.
![]()
Choose a background image from your gallery or stock photo libraries like Unsplash or Pixabay. For this edit, I am going with a pastel-colored background image to add a fresh feel to the composition. You can choose a patterned background if you want to. That will be a better option if your foreground is simple. You don't want your image to be cluttered.
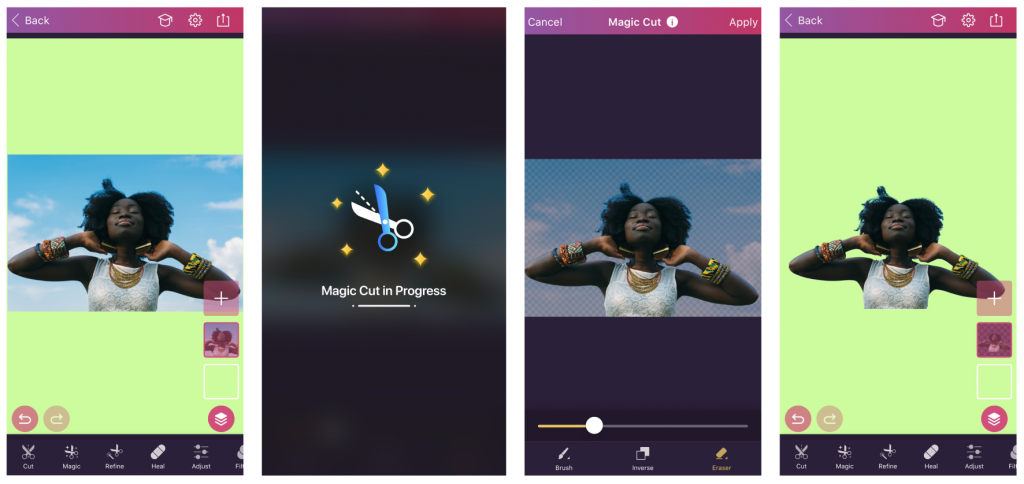
Choose a portrait that you want to work with. Click on the Magic cut tool. It would identify the main object on your photo and automatically separate it from the background. When you’re done, click Next.
You can now edit your cutout by using Refine tools. You choose the Hair tool in the Refine section. Use it to outline the person’s hair for a more accurate cutout. Once you’re done, tap Apply.
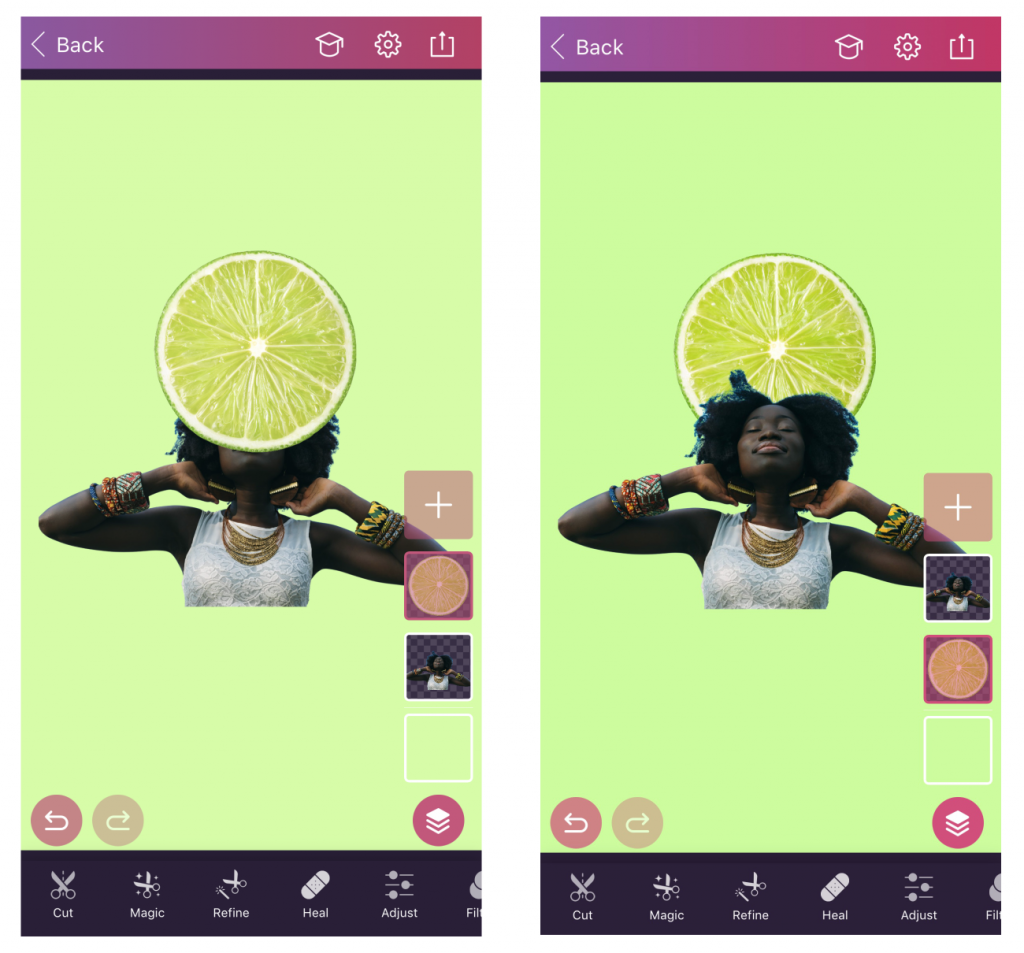
Create a cutout of lime with the Magic Cut tool. To place it behind the model, drag the layer that contains the lime below the layer that contains the subject.
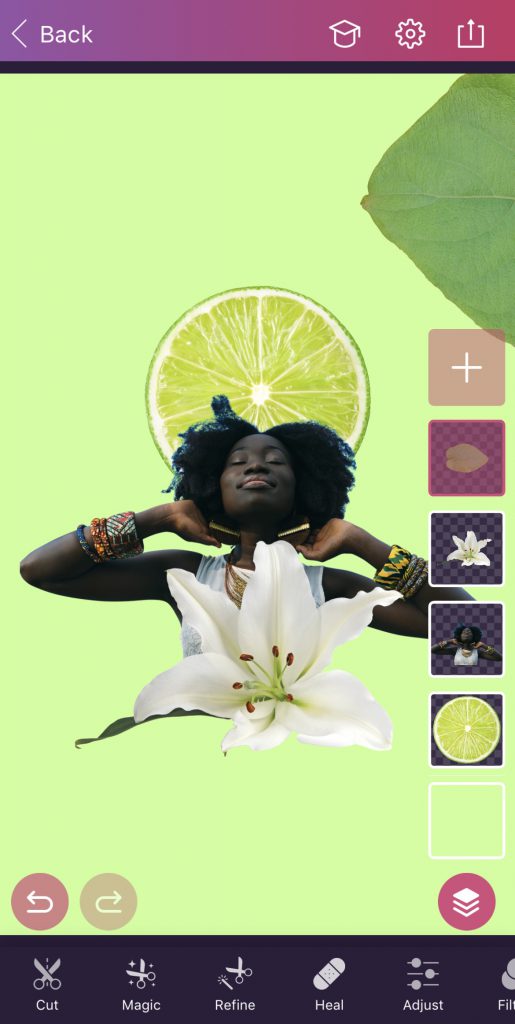
Create a cutout of a flower and a leaf just like you did with the model and the lime with the Magic Cut tool. Next, add them to your composition.
Notice how I used different shades of green. You do not have to use different shades of the same color for your collage, but consider that technique if you want to add a calming feel to your image.
Next, frame this picture with more leaves. To do that, click on the icon in the top right corner and tap on Save Image. Now, click on the X icon in the top left corner, hit Reset, and start a new session.
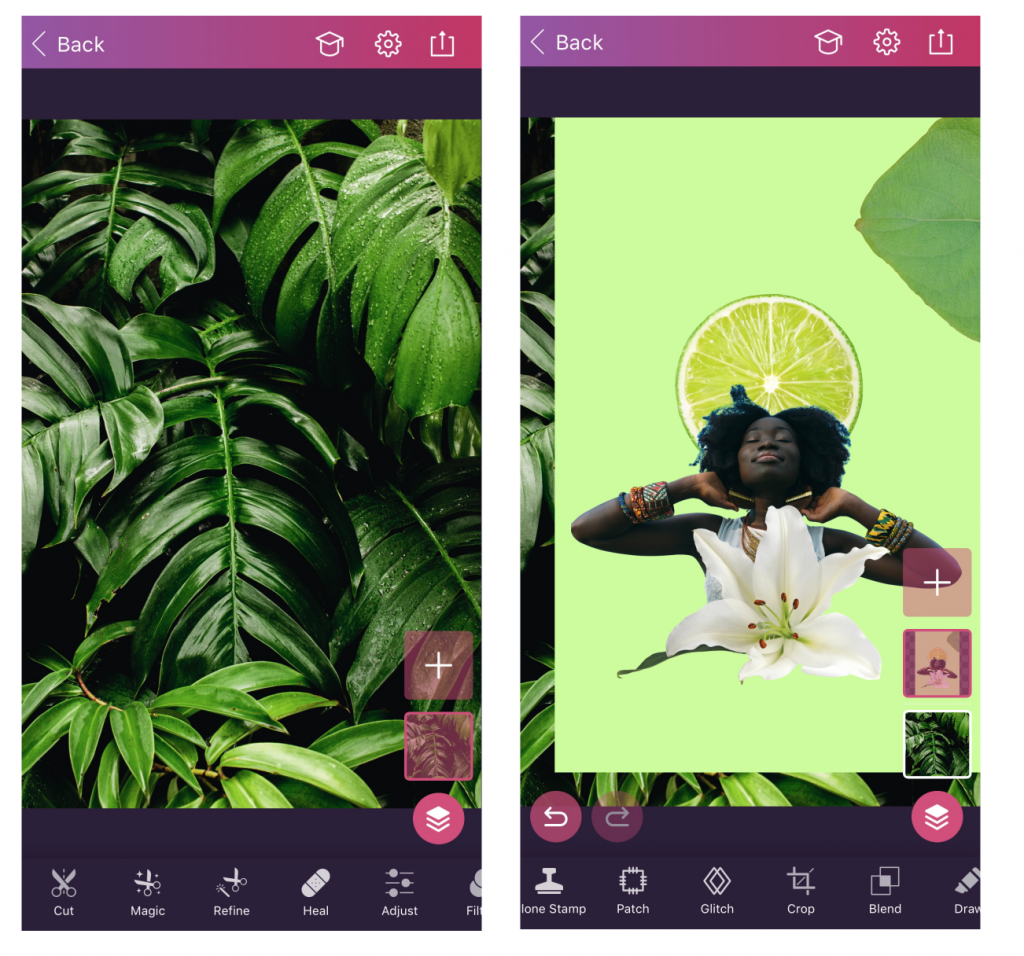
Choose a background that contains small leaves that complement your composition. Click on the plus icon, and add the image that you saved previously. Voilà!

Click on the icon in the top right corner. Save the image and the session. You can also publish it directly on different social media platforms.
Now that you know how to create digital collages using Pixomatic check out the following article for some inspiration!