Back
Back
 Pixomatic Team
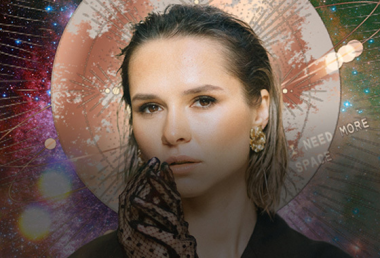
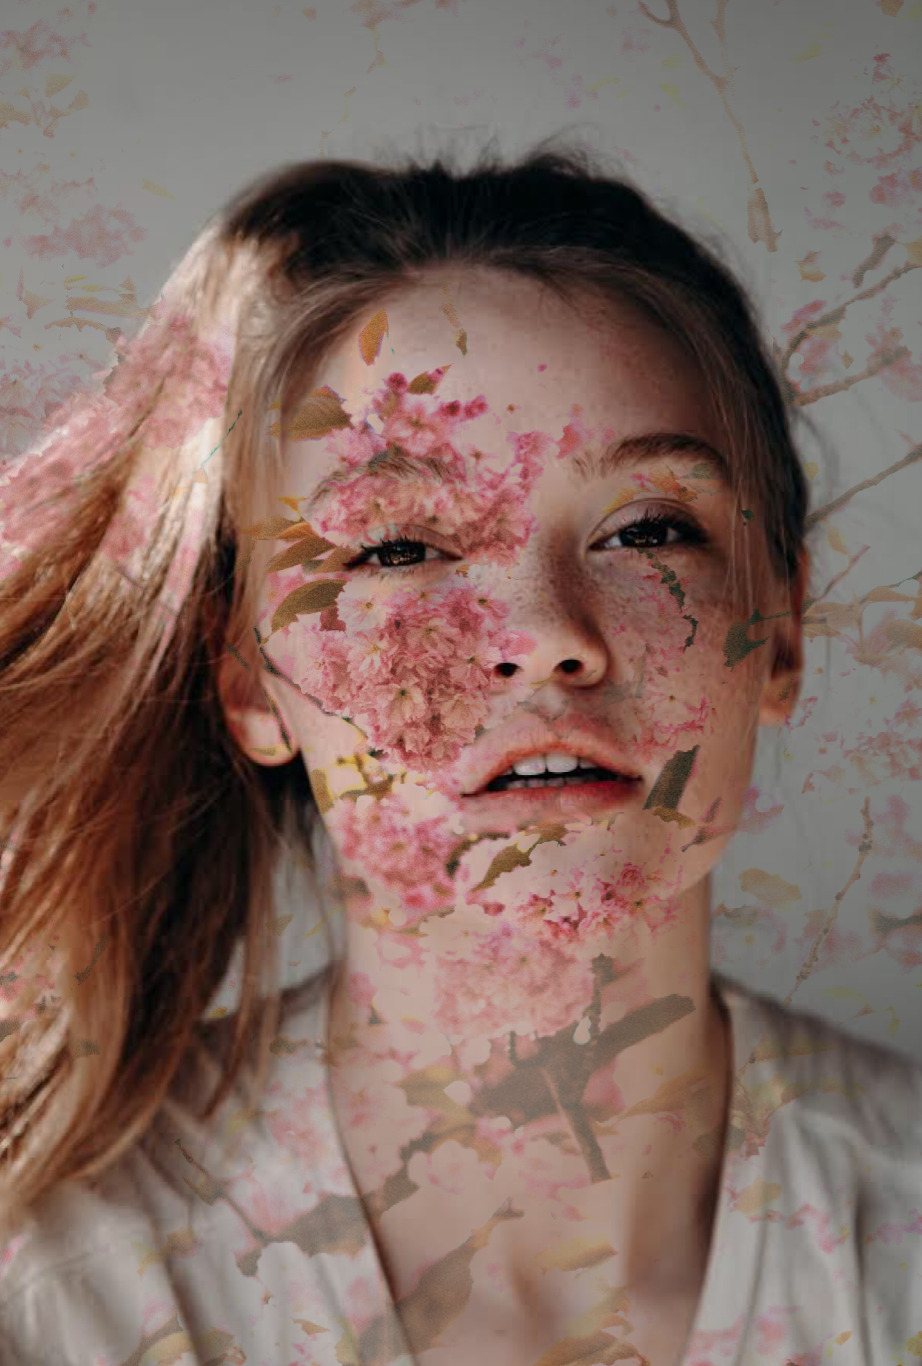
The double exposure effect is breaking the internet! This tutorial will show you how to create amazing double exposure images using the Pixomatic mobile application and online photo editor. In case you didn't know, the double exposure effect combines two photos into a single image. This technique lets your creative juices flow and allows you to create artistic compositions. This editing tutorial will show you how to combine a portrait and a photo of a landscape to create a mesmerizing image. The final result will help you upgrade your Instagram feed and portfolio. Don’t worry - it’s pretty simple to do; just follow the steps below!
Pixomatic Online Photo Editor is available on Chrome, Firefox, and Opera.
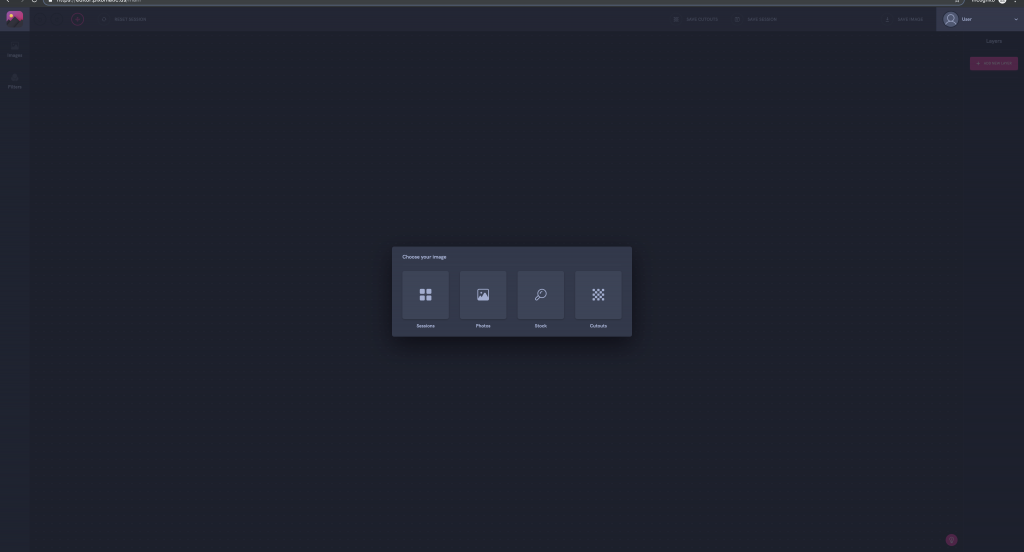
Choose an image of a landscape, preferably one that contains trees or flowers to add colors and patterns to your image. You may choose a photo from your gallery or from the integrated stock photo libraries.
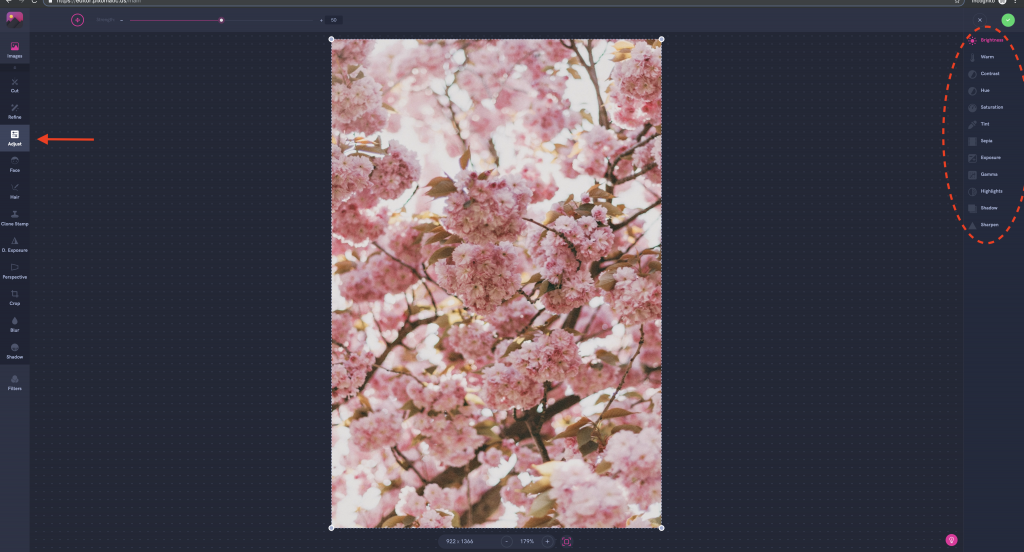
Select Adjust in the left panel and increase the brightness, contrast, and gamma values.
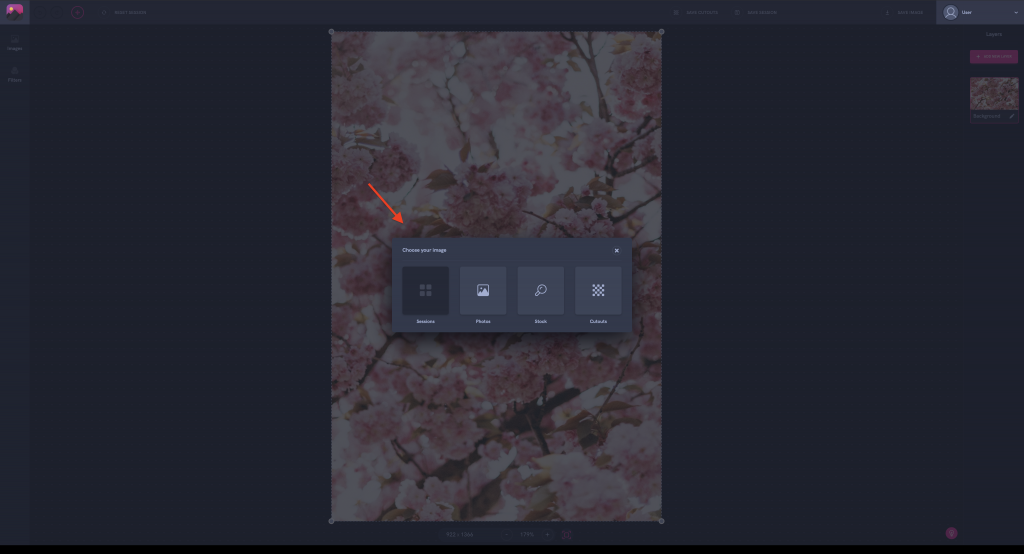
Select Add New Layer to add a second image. Upload a portrait of a person; the background should preferably be neutral. You may upload your own photo or choose one from Pixomatic’s integrated stock photo libraries.
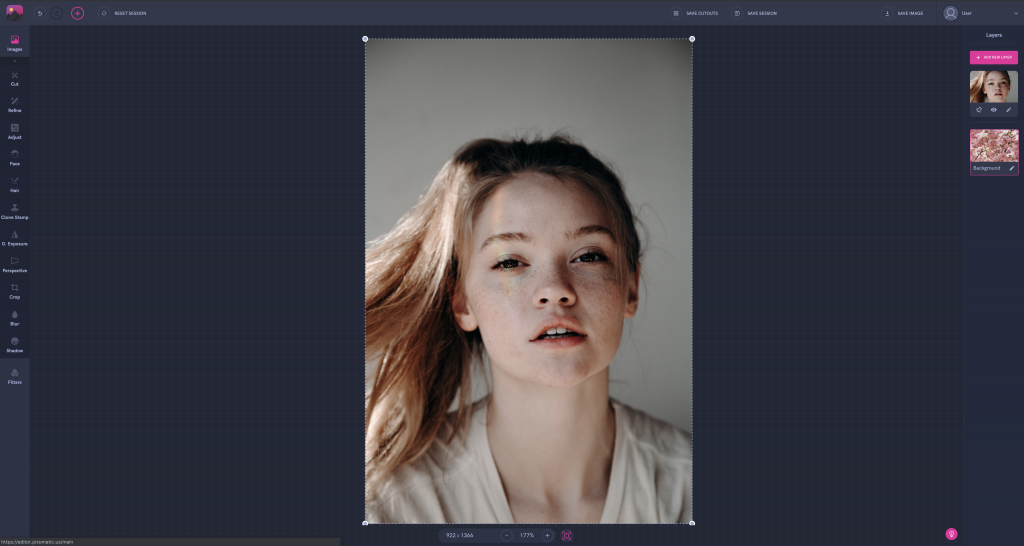
Adjust the size of your image and fit it over your background image by dragging one of the corners upwards or downwards to resize it.
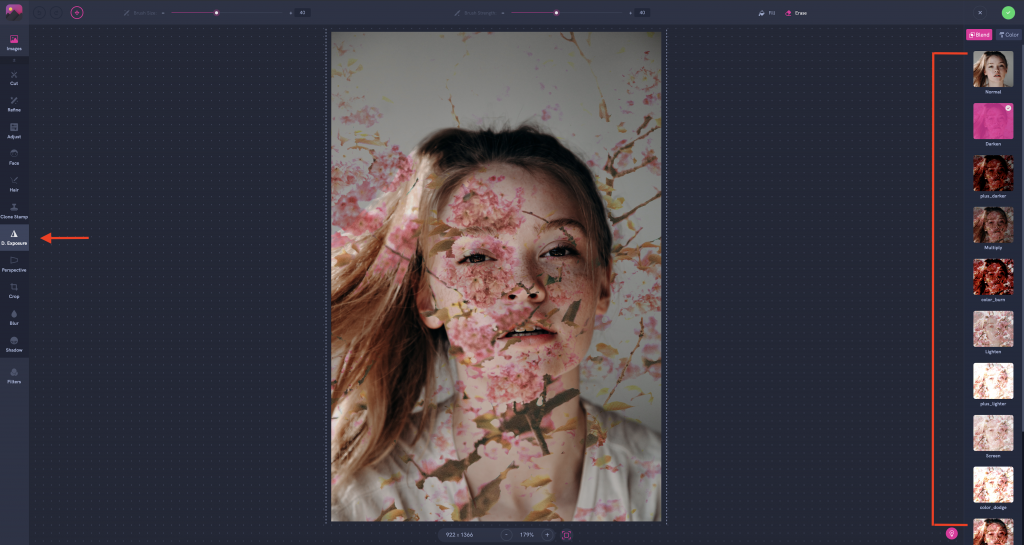
That’s the most exciting part! Click on Double Exposure in the left panel and select the blending mode in the right panel. The most common mode for double exposure images is Lighten. We will choose that for this editing tutorial. Move and resize the second layer, then hit the apply button.
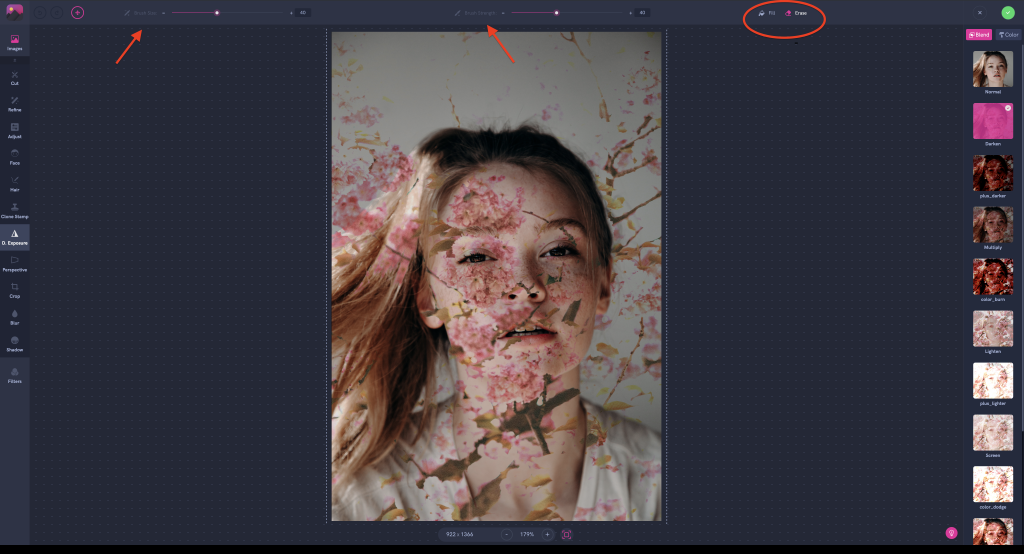
Select Refine in the left panel and click on the eraser in the top panel. Adjust the size and intensity of the brush. Go over the areas you would like to be removed. When you are done, click on the green circle at the top right corner!
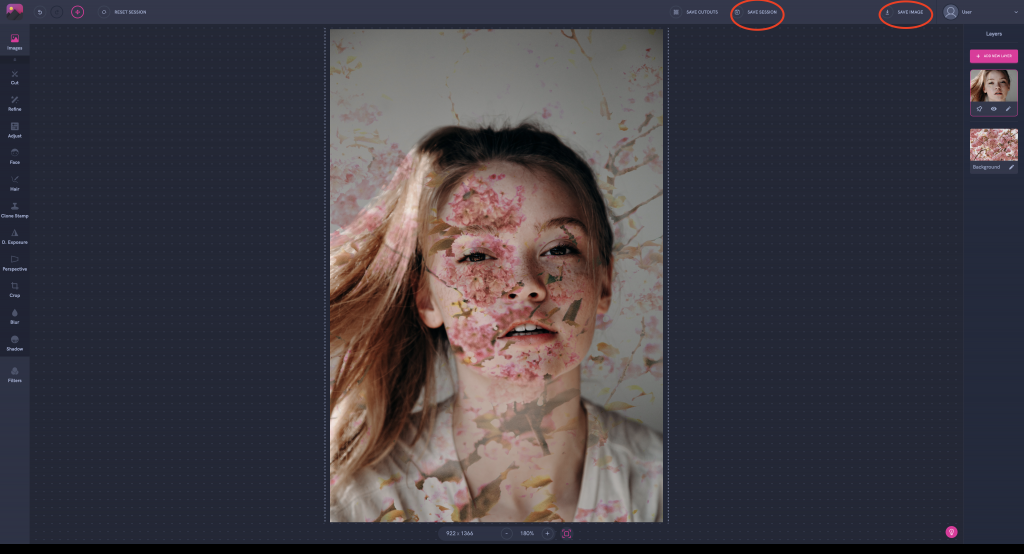
Click Save Session if you want to edit your work later, or hit Save Image to download your image.
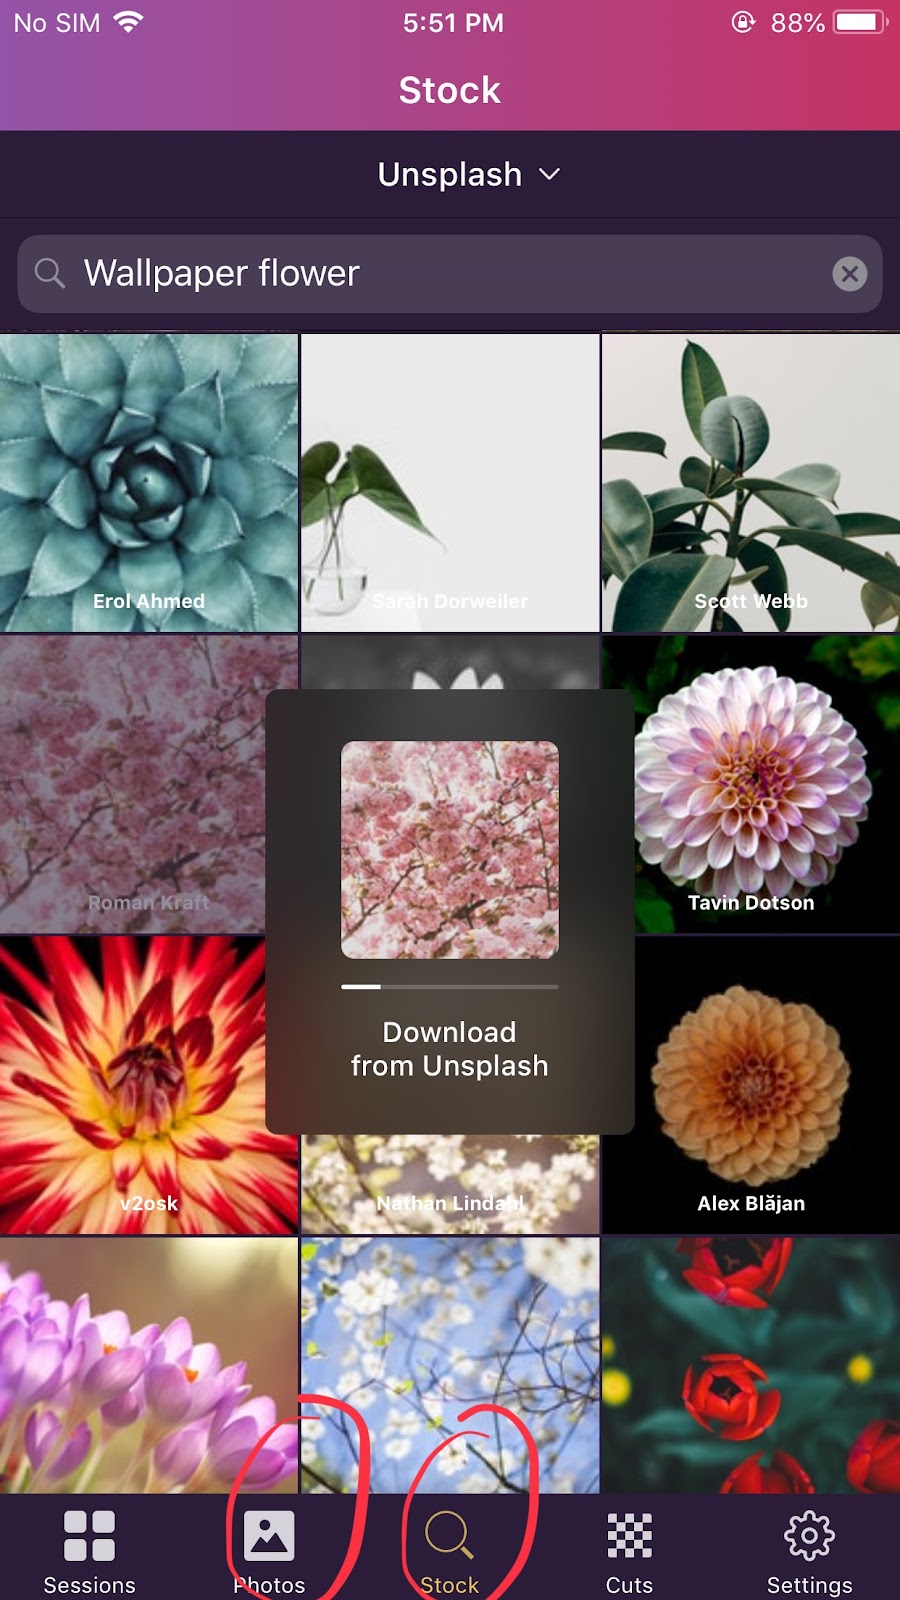
Choose an image of a landscape, preferably one that contains trees or flowers to add colors and patterns to your image. You may choose a photo from your gallery or from the integrated stock photo libraries.

Select Adjust and increase brightness, contrast, and gamma values.
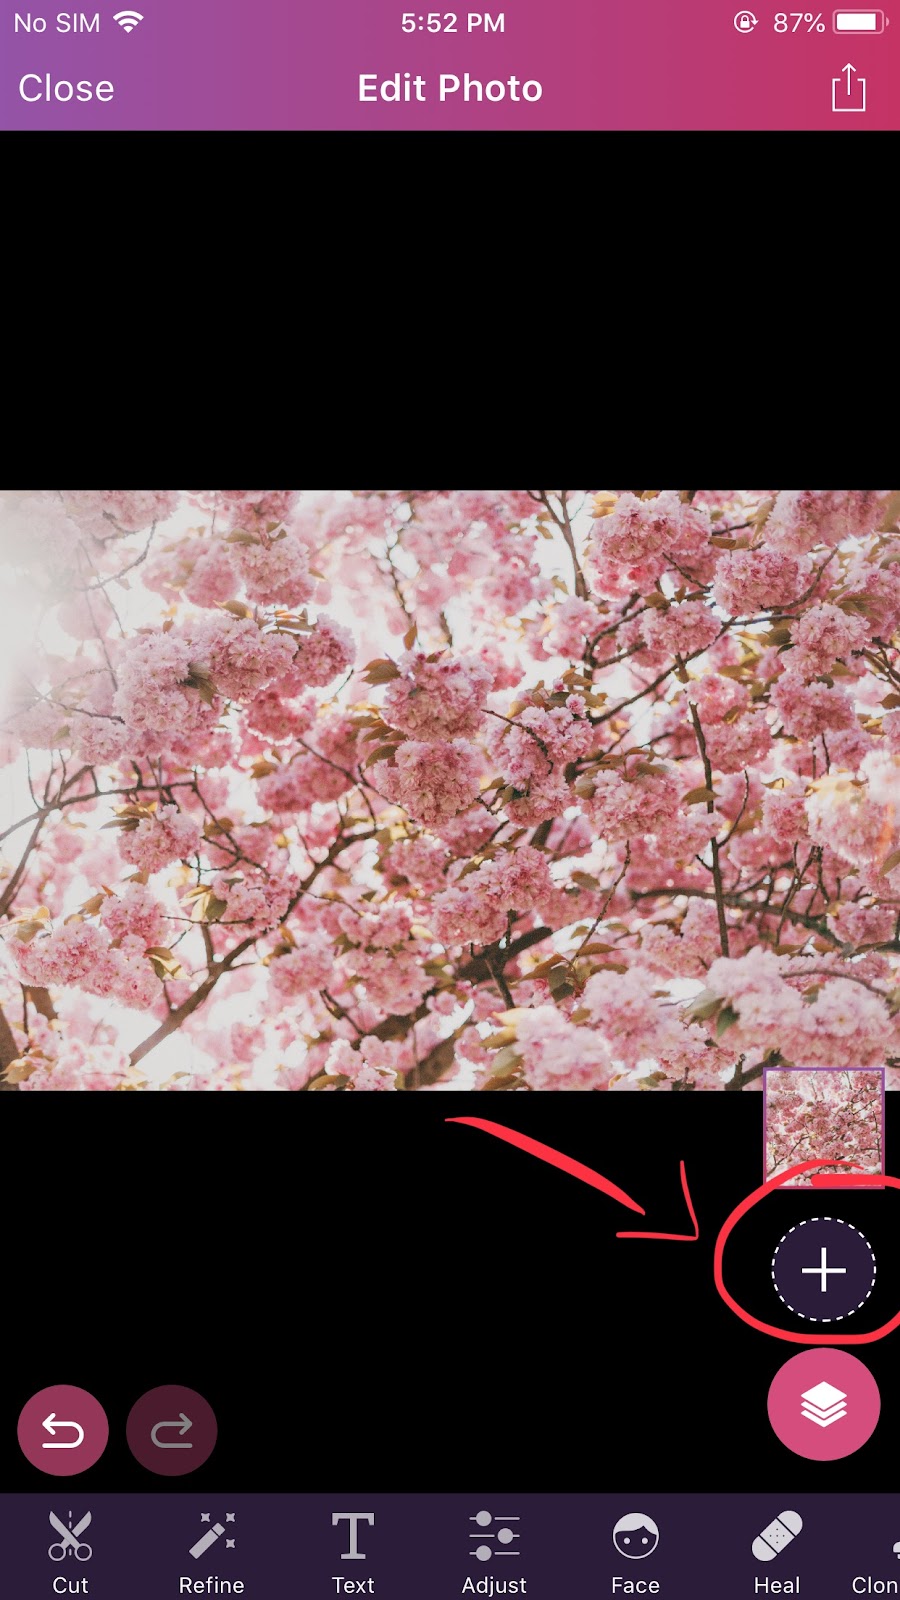
Tap on the plus sign to add a second image. Upload a portrait of a person; the background should preferably be neutral. You may upload your own photo or choose one from Pixomatic’s integrated stock photo libraries.
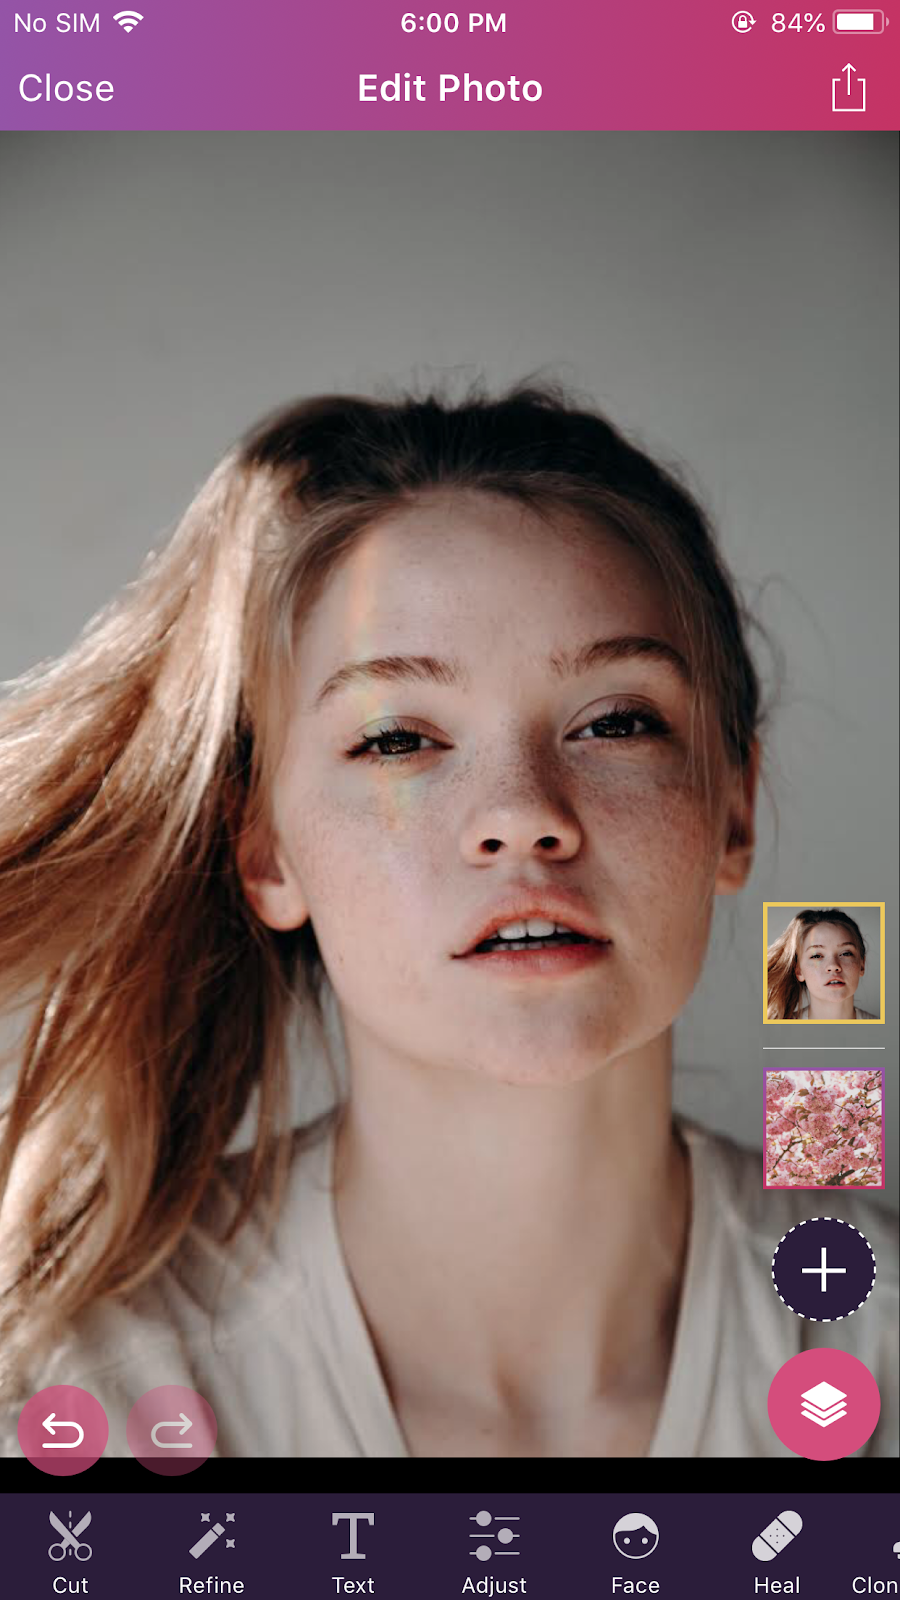
Adjust the size of your image and fit it over your portrait by dragging one of the corners upwards or downwards to resize it.

That’s the most exciting part! Click on D. Exposure and your preferred blending mode. Move and resize the second layer, then hit Done.
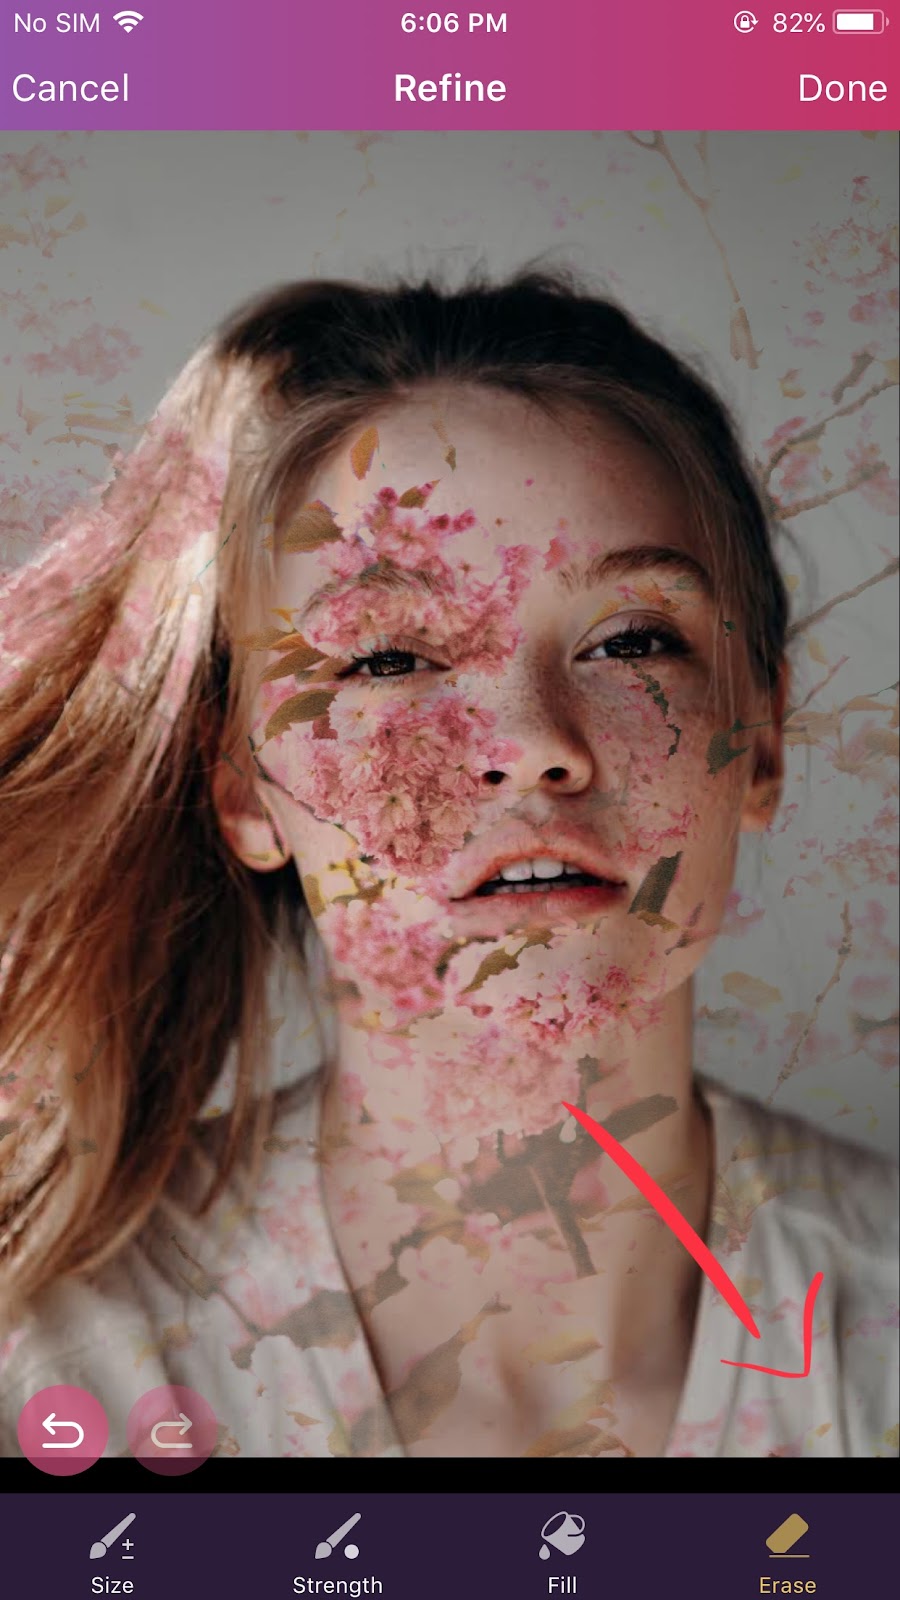
Select Refine and click on the eraser. Adjust the size and intensity of the brush. Go over the areas you would like to be removed. When you are done, click Apply!
Click on the arrow at the top right corner. Tap on Save Session if you want to edit your work later, or hit Save Image to download your image.
Now it's your turn to try! All you need is a Pixomatic account. If you do not have one, sign up now. Pixomatic is available on iOS and Android devices! Get it on your smartphone and edit anywhere, anytime!