Back
Back
 Pixomatic Team
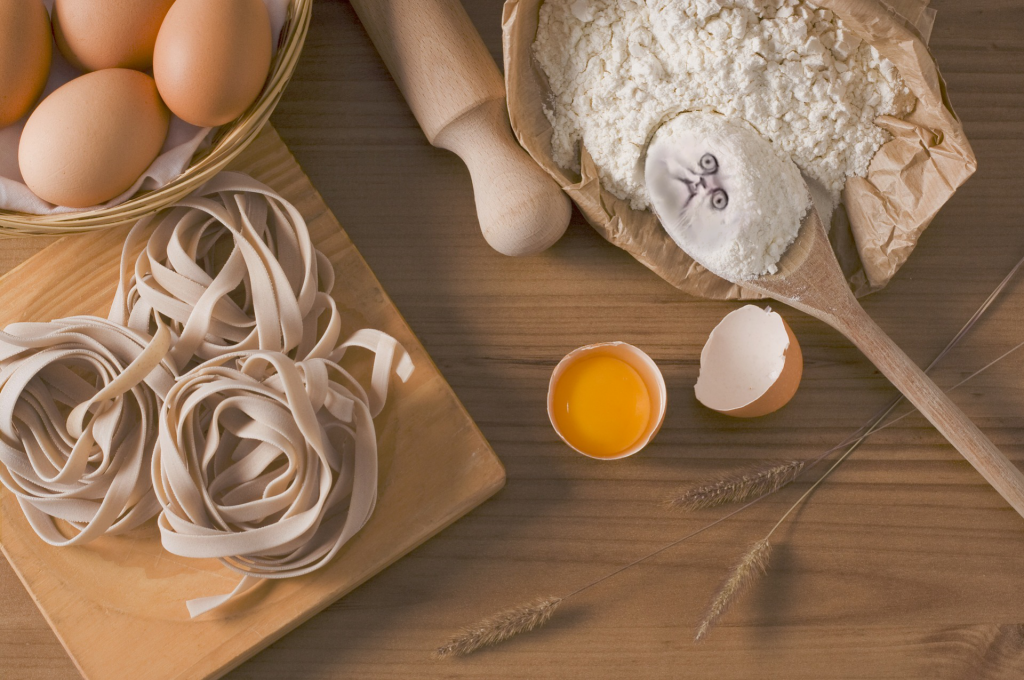
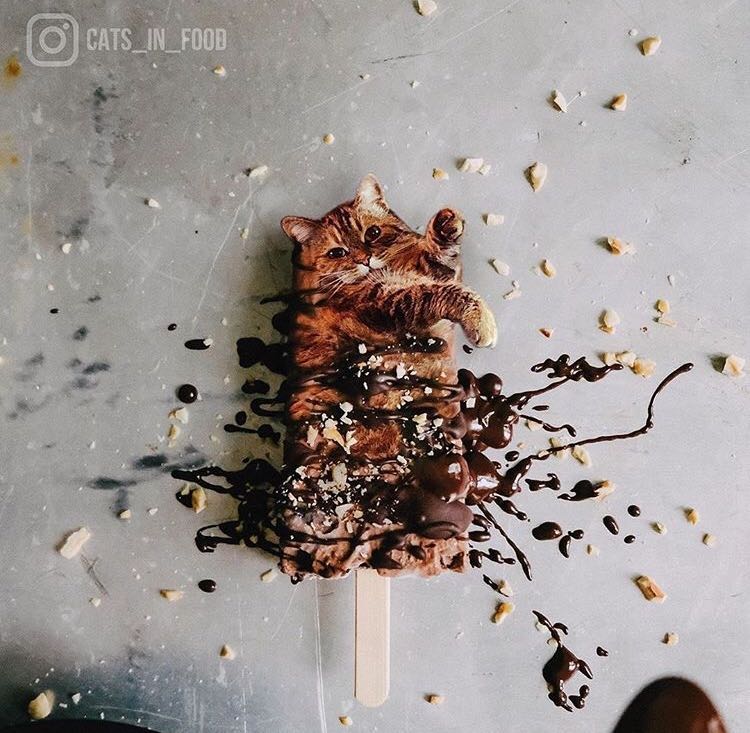
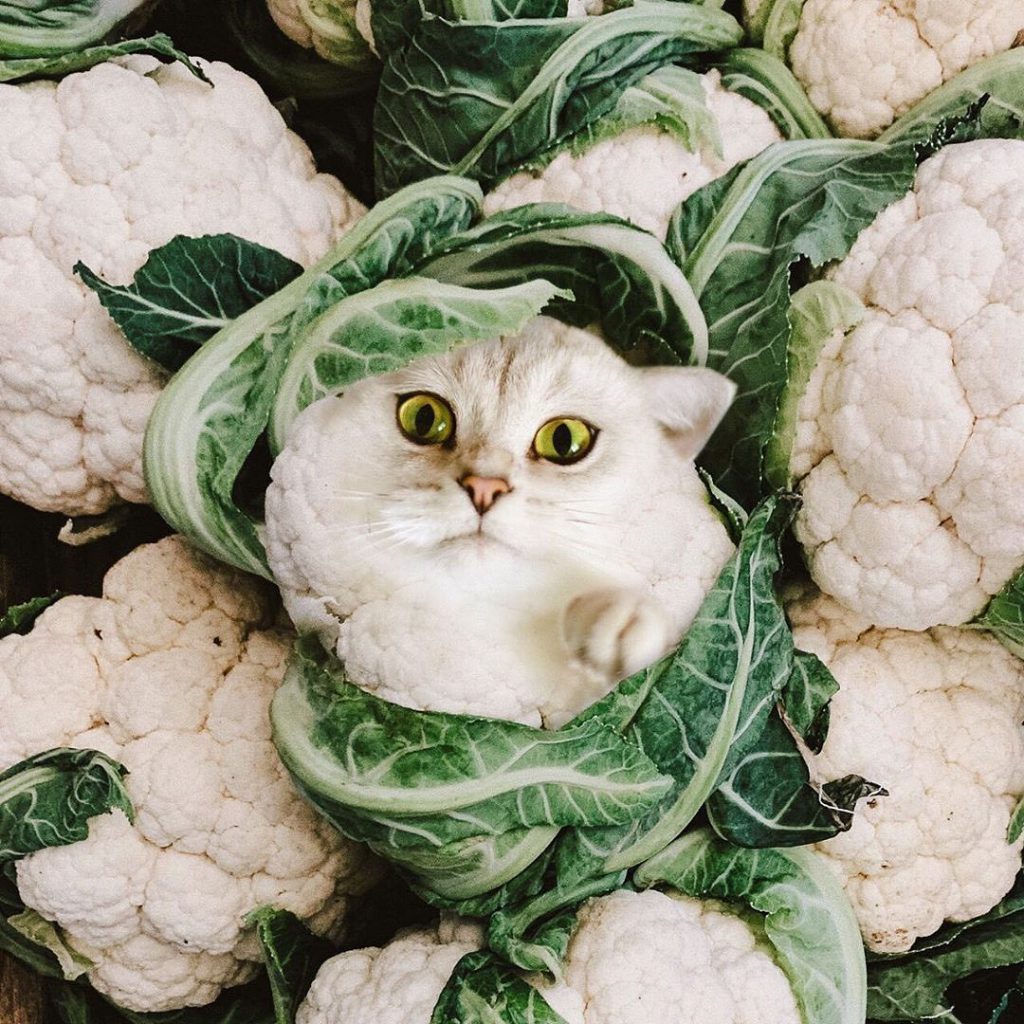
Did you see those quirky photos of cats in food? Pop culture magazines show that cats in food is part of a larger trend that can be traced on Instagram, Pinterest, and other social media platforms. The sub-trend is based on taking photos of cats and blending them with a food of your choice to merge the images together. What could be sweeter than delicious food with cats?
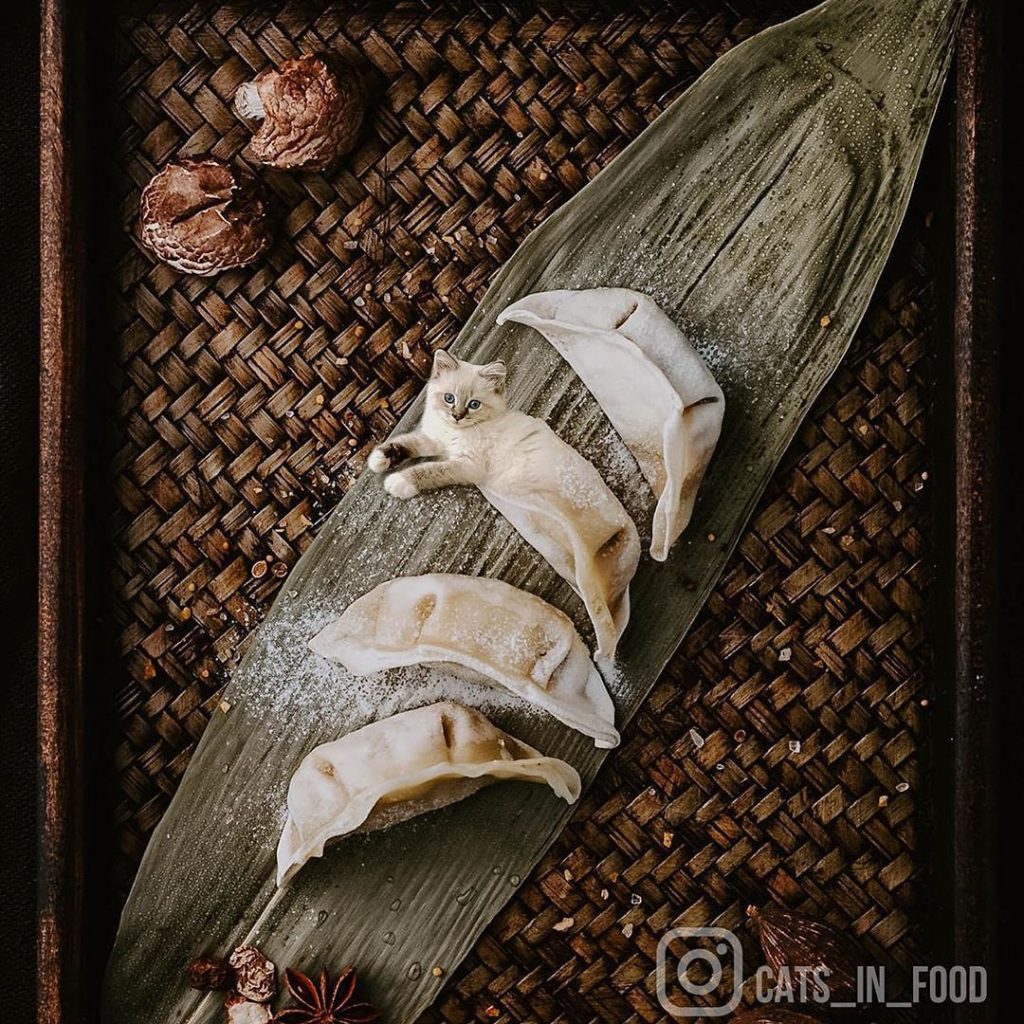
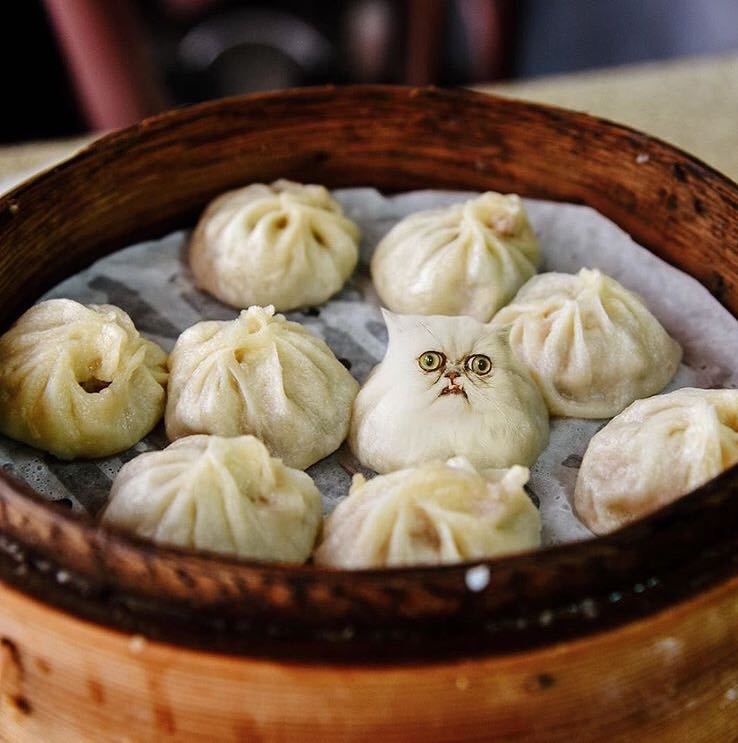
Online bloggers and artists like @cats_in_food are being very creative in their style and choice of food when creating edible cuteness, and so can you! It may seem like you need a degree in photo editing to recreate these images but Pixomatic has all the tools you need to make your own culinary masterpiece.
The process of making such photo edits is very simple and can be easily replicated. Pixomatic has layer based photo editing features which come in handy when dealing with two or more images. You can join the trend from your computer or even on-the-go with the user friendly Pixomatic mobile app that has all the features you need.
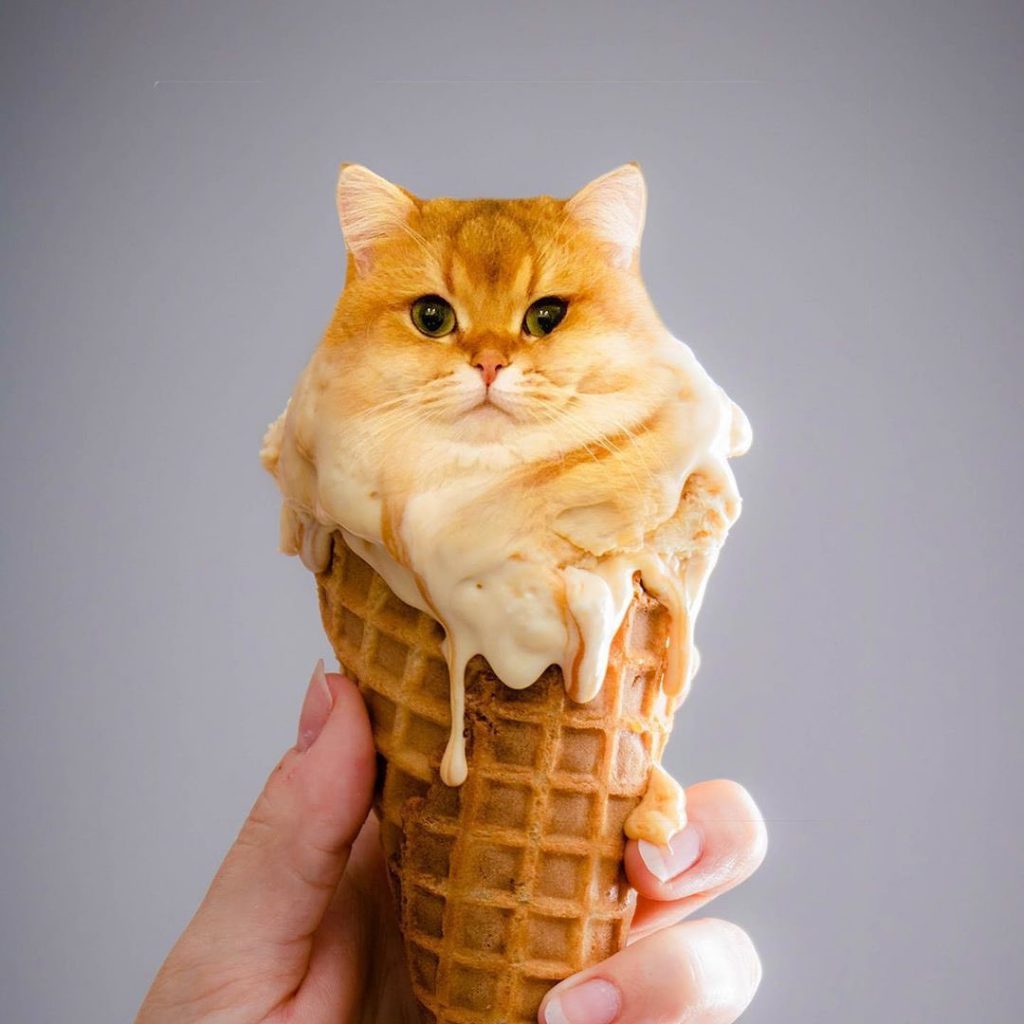
What are the main steps, you may wonder? Most of the cat-in-food photos follow a general system of choosing photos, cutting (optional), refining, adjusting, and finally saving. Depending on the food or idea chosen, the steps may grow or lessen. To demonstrate the ease we will recreate a “cat in an ice cream” photo with the Pixomatic mobile app.
A little disclaimer, this is generally the toughest part. It may take a while to pick a suitable pair of images, not because the platform is confusing, but rather there are thousands of options.
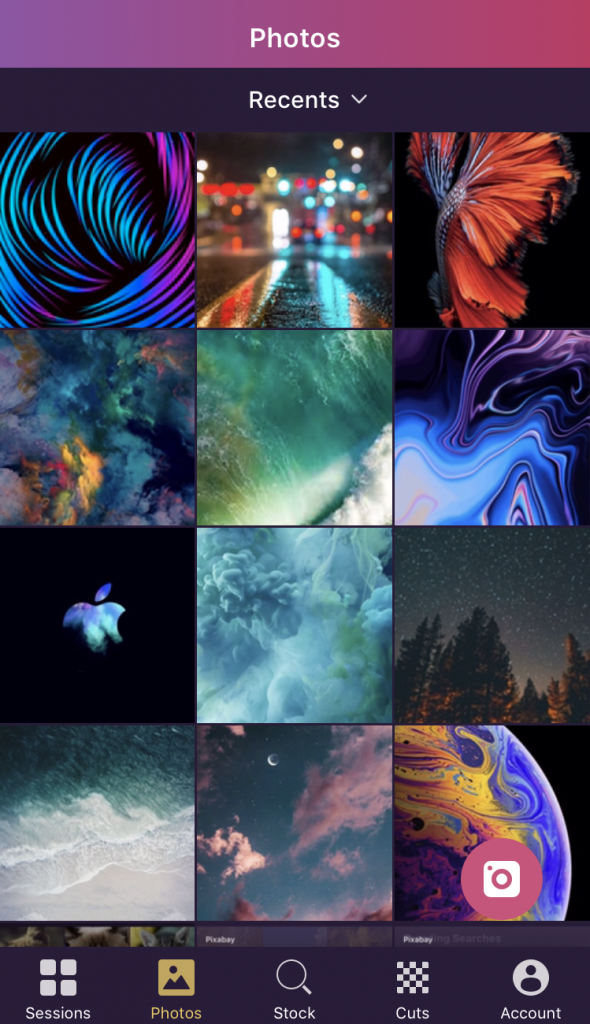
When opening the mobile app you will first see the ‘Photos’ tab from where you can easily import photos stored in your phone camera roll.
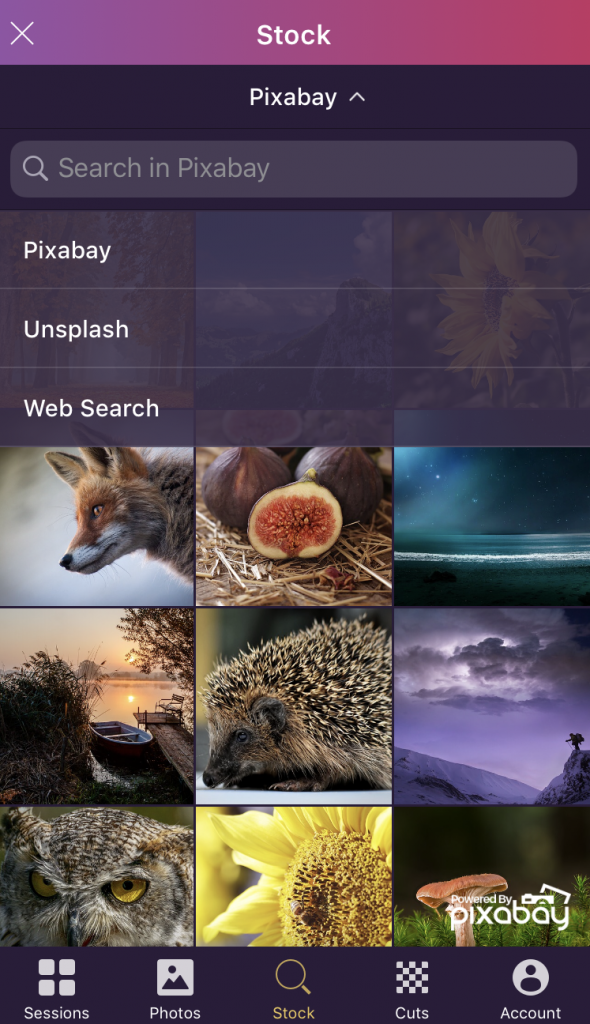
To make your search easier, you can look for photos directly from the app, there is no need to open a web browser. All you need is to enter the ‘Stock’ tab at the bottom. Here you can search for images to use. At the top of the tab you can use the drop-down list of three external image sources: Pixabay, Unsplash, and Bing Web search.
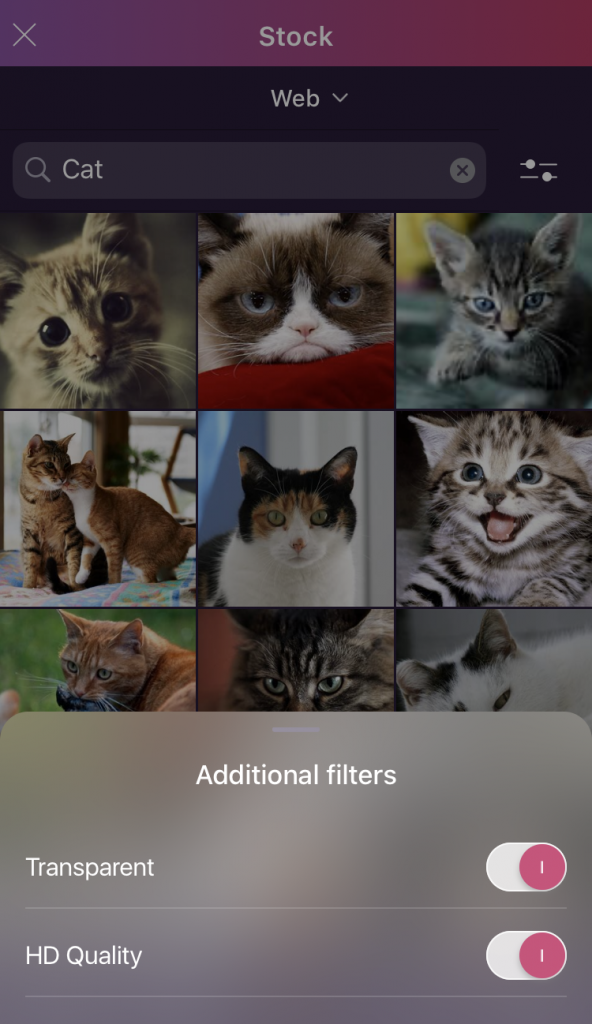
To narrow your search in the Web search you are free to use filters (top right button) to find transparent and/or HD photos. This will save you both time and effort when creating your masterpiece blend.

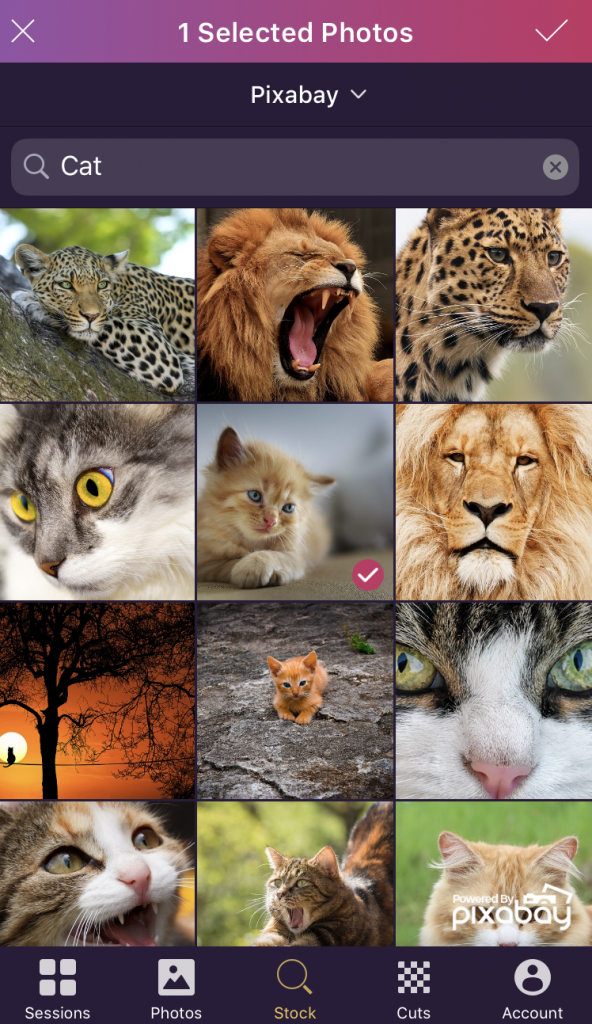
Once you choose the photo(s) you want to use, tap on them and press the tick in the top right corner to confirm your choice. The chosen images will be downloaded and ready for editing.
For the “cat in an ice cream” photo edit, you will need more than one image layers. After choosing the first photo, tap on an empty layer and choose an ‘Image Layer.’
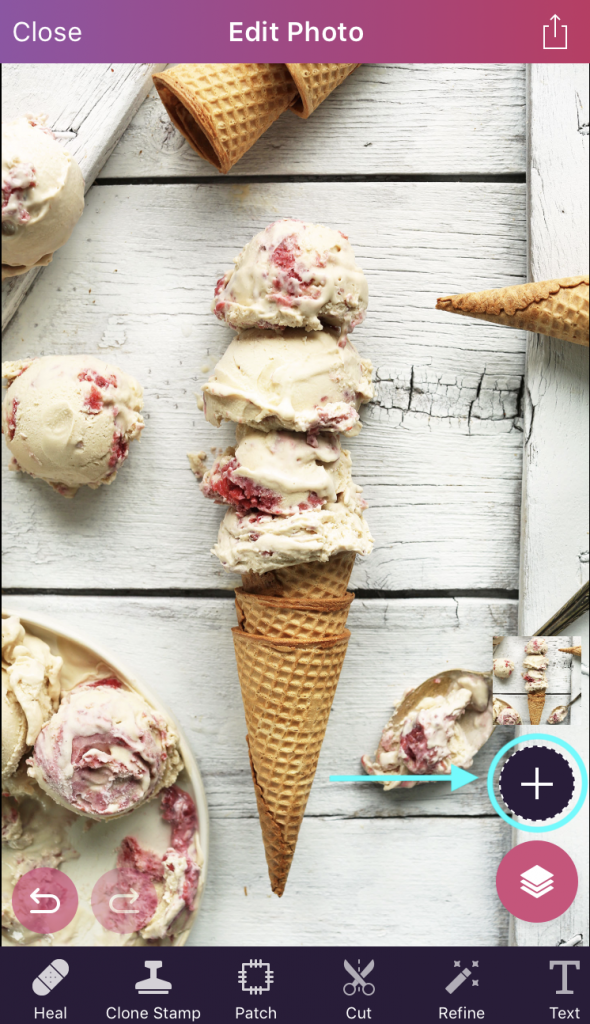
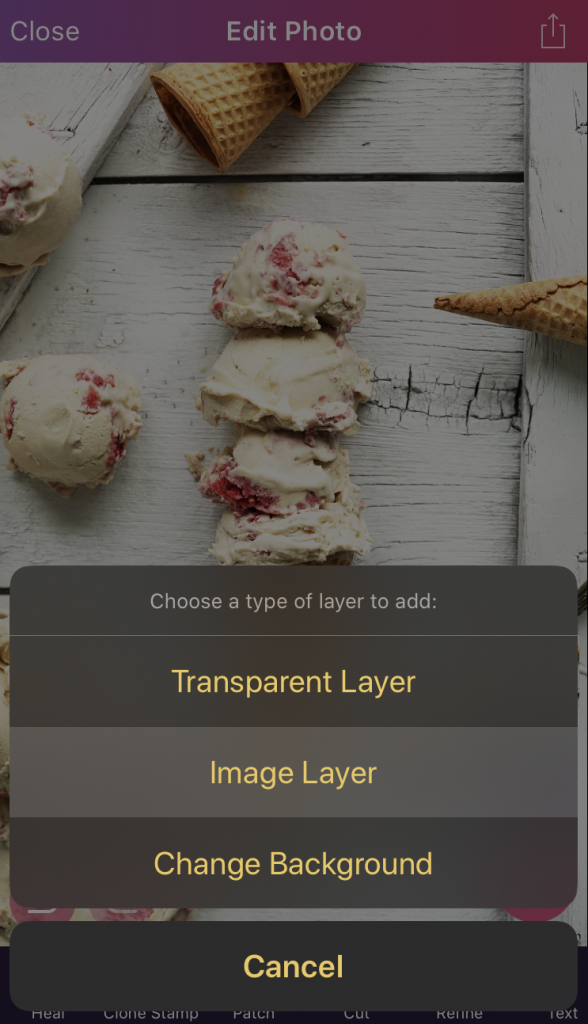
Note: Select your food photo first as background and then the cat image as a foreground layer.
This step is essential if your foreground cat image is too large. With the ‘Cut’ tool you can highlight the edges of your desired object in one swift move and fill or erase areas afterwards. It is a better alternative to ordinary cropping as it is more flexible and accurate for cutting irregular forms.

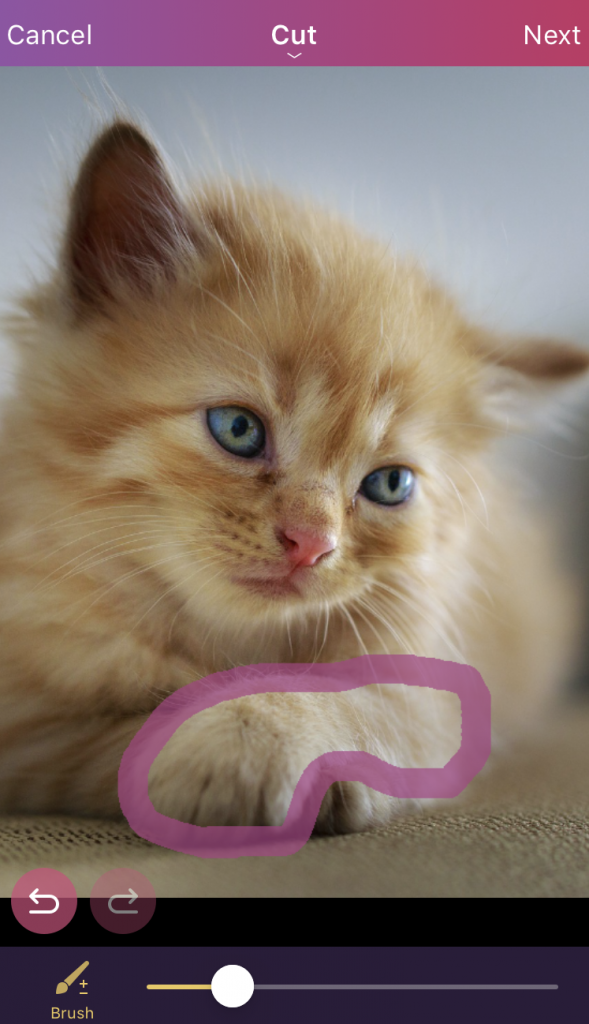
When cutting out an image of a furry cat you will face an issue with the clear-cut edges. To make the cut more life-like, you can use the Hair’ tool in the ‘Refine’ option. All you need to do is highlight the areas that have protruding hair or whiskers. The results will make the outline less sharp and easier to blend with the background. You can then ‘Smooth’ the outline and erase excess areas.
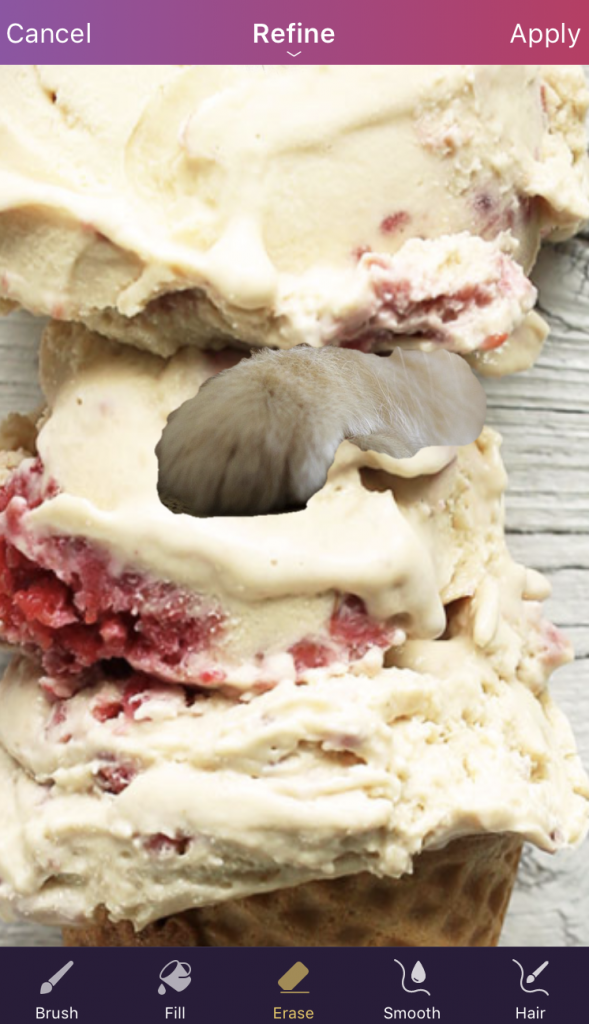
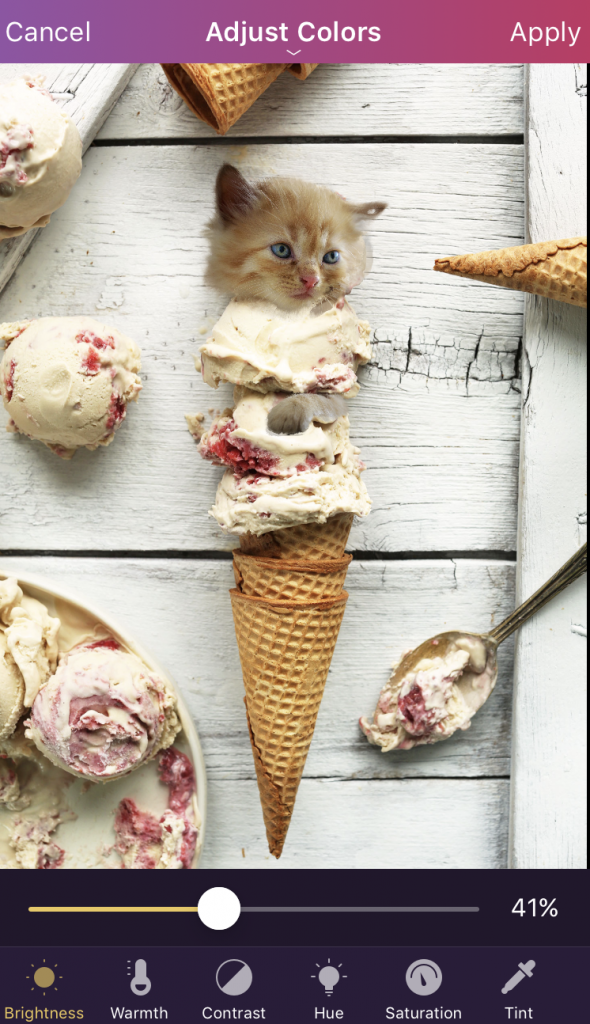
It is rare to find a photo that perfectly reflects the tones of the background layer, which is why this step is necessary to fade the line between the multiple layers. In this case, the cat had its photoshoot in a dim-lit environment which is colder in color temperature than the sunny ice cream photo. To eliminate the differences we selectively adjusted the brightness (41%), contrast (56%), saturation (61%), shadow (74%), and vibrance (54%) of the cat’s face. Similar stages are repeated to the cat’s paw.
Note: The ‘Adjust’ option has other useful tools that you can use depending on your layer differences.
Pixomatic makes resizing and positioning quick and simple, all you need to do is tap on the layer you wish to alter, and pinch or drag on the screen into position. At this point, the editing process ends and you can proceed to save the session for further use, save the final image to your camera roll and/or share it.
![]()
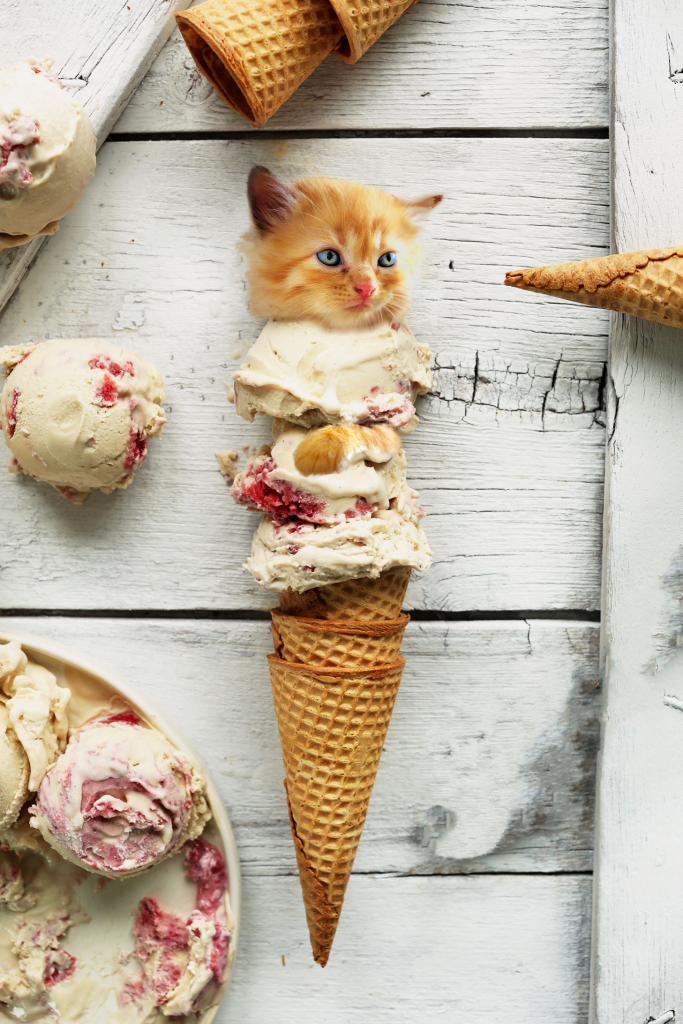
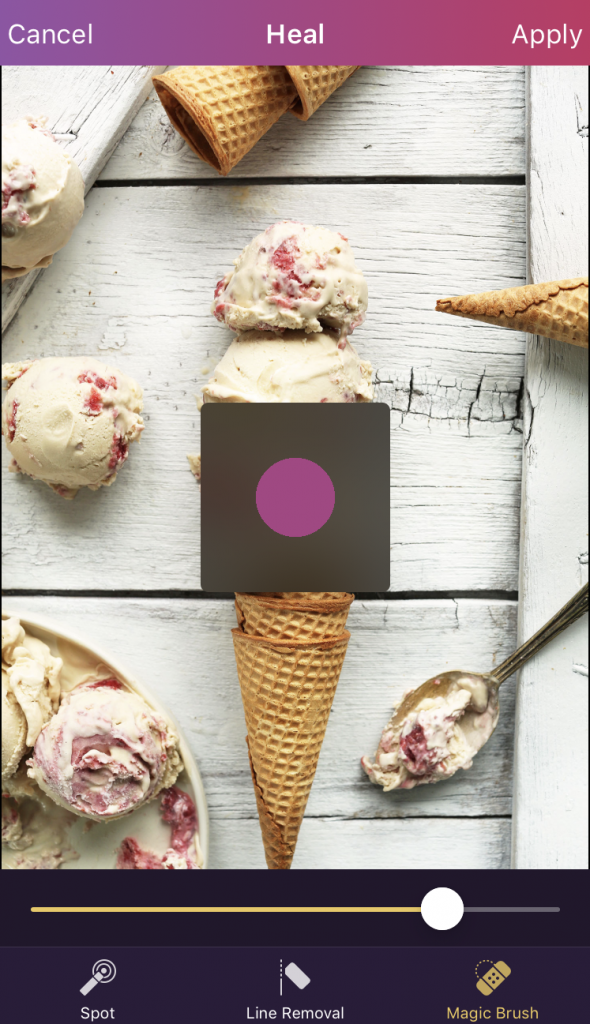
Check your attention! Did you notice that the spoon magically disappeared? Pixomatic’s ‘Magic Brush’ tool can remove any object you don’t wish to include in a photo. This step is optional but can significantly affect the final product. With the absence of a spoon the image becomes less cluttered, which makes the ginger ice cream scoop the focal point. To achieve this effect, you need only choose ‘Magic Brush’ in the ‘Heal’ option and highlight the part you wish to disappear.
Note: You may need to repeat the step if there are many colors in the area.
You can use the tools to blend an image of your choice in whichever way you like! A photo edit like this can take around 5 minutes and the possibilities are limitless. We cannot wait to see your creations!