Back
Back
 Pixomatic Team

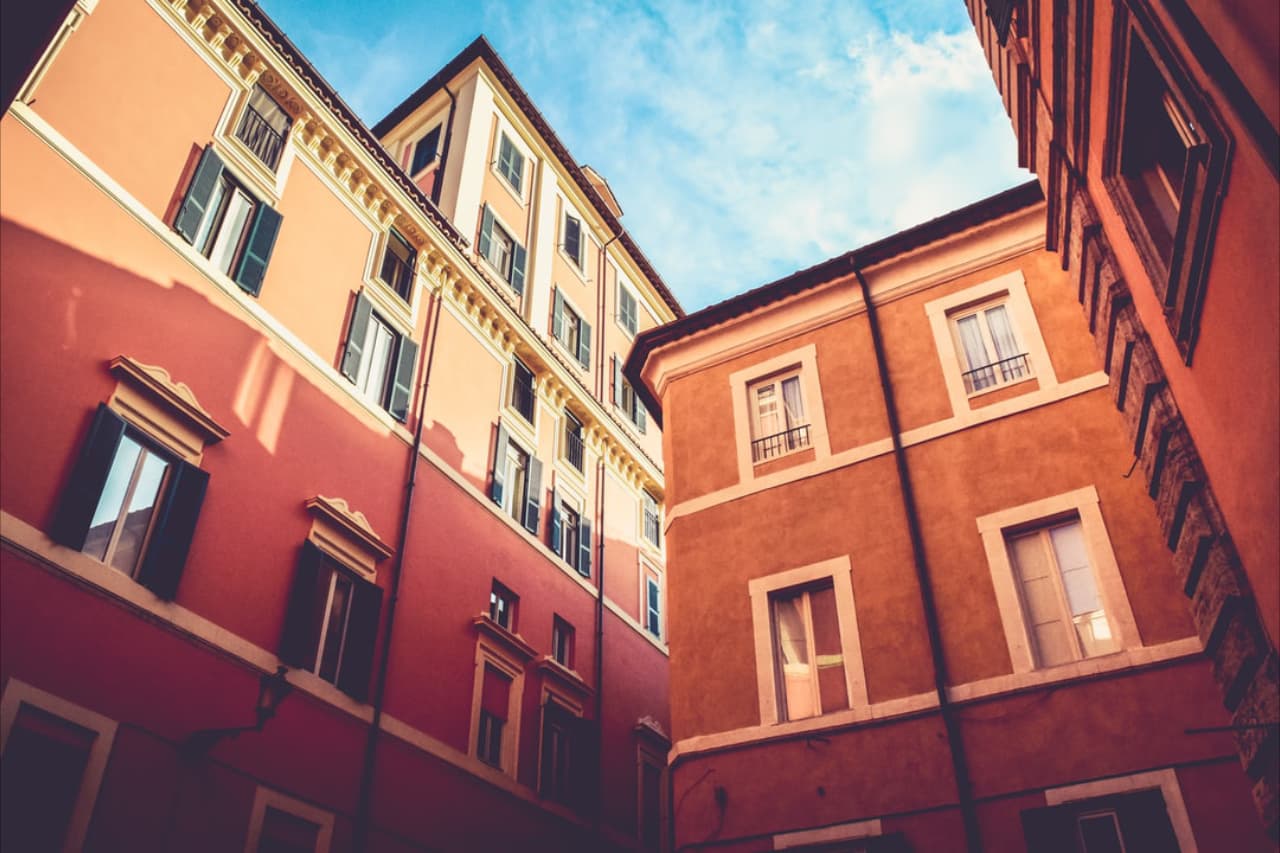
Architecture photography was always in trend but it is time to spice things up! Let us take Pablo Iranzo Duque’s creative approach and look at buildings at a different angle. Did you ever peek into people’s windows when on a long walk? I am guilty of this myself, but only because I tried to understand what characters lived inside. Following this trail of thought, you can look at buildings as books, with windows into character lives and stories. Pablo, whether he was aware of this metaphor or not, blurred the line between fantasy and imagination, literally! To use this trick in your own photography, you can turn buildings into books with this six-step blur tutorial.
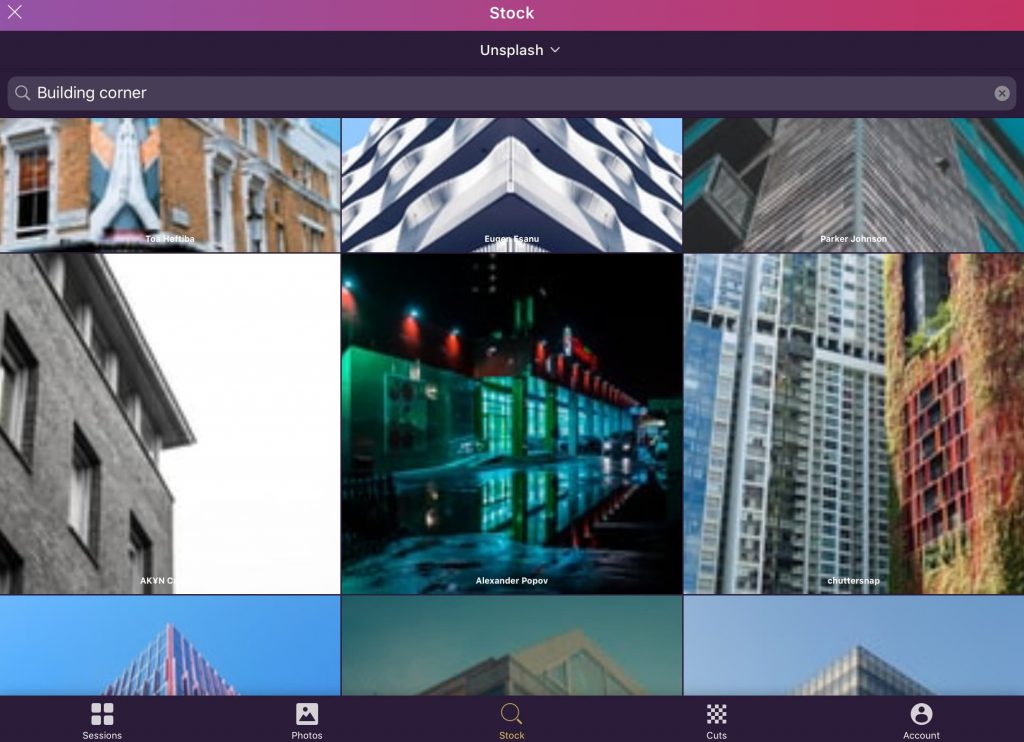
Start by opening Pixomatic’s photo editor and decide on the image source. You can use images from your personal gallery or the stock photos available from Unsplash and Bing. Select a photo where two buildings form an inverted corner. The buildings do not have to be physically connected but there should be a visual corner that will be used as the spine of your book.
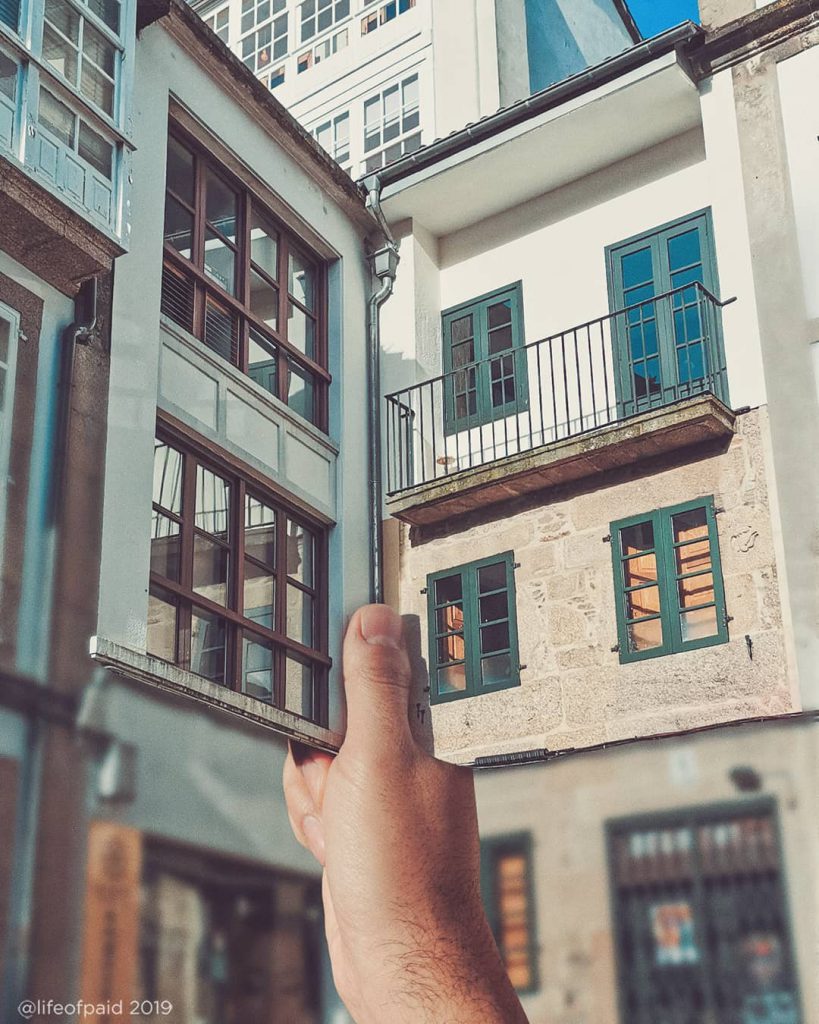
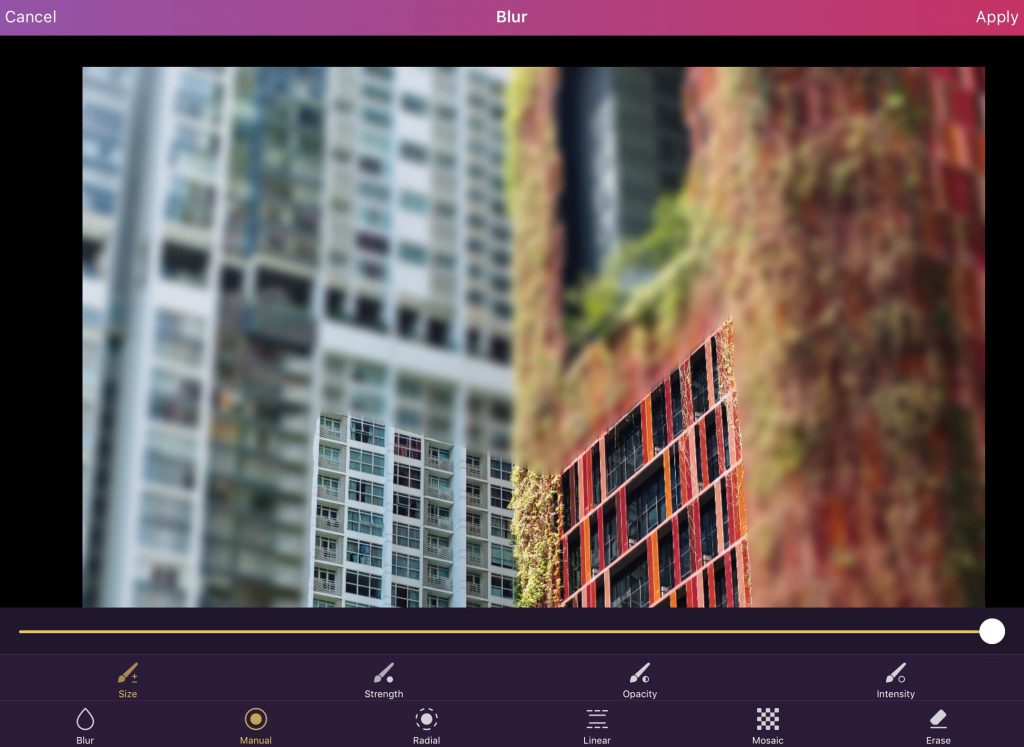
Pixomatic’s Manual blur tool is perfect for detailed editing. Adjust the brush size, edge strength, and brush intensity. It is preferable to keep the opacity on maximum for sharper results. First, visualize where the book spine will be and make an outline of the pages with the blur brush. Then, you can increase the brush size and cover up the rest of the photo.
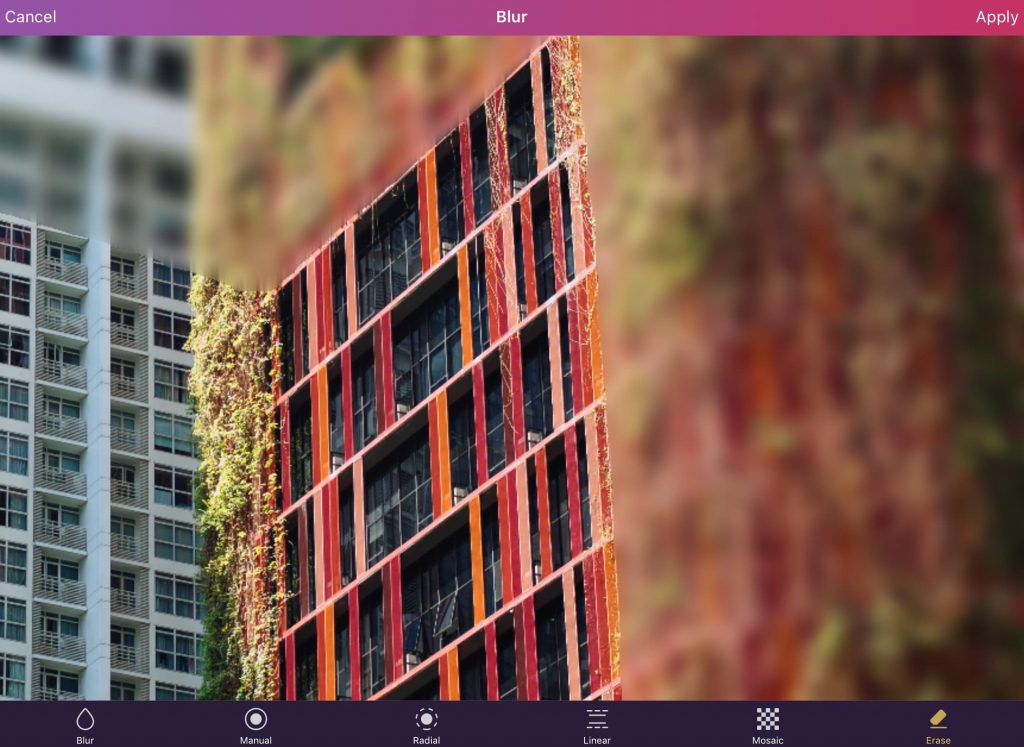
Making straight lines might not be easy even if you are using a touch stylus. Thankfully, Pixomatic’s Blur tool has an Erase feature, which will come handy for removing excess blur and sharpening the book borders.
Pro tip: Alternatively, you could use the full Blur tool to cover the entire image and then use the erase feature to draw the book outline.
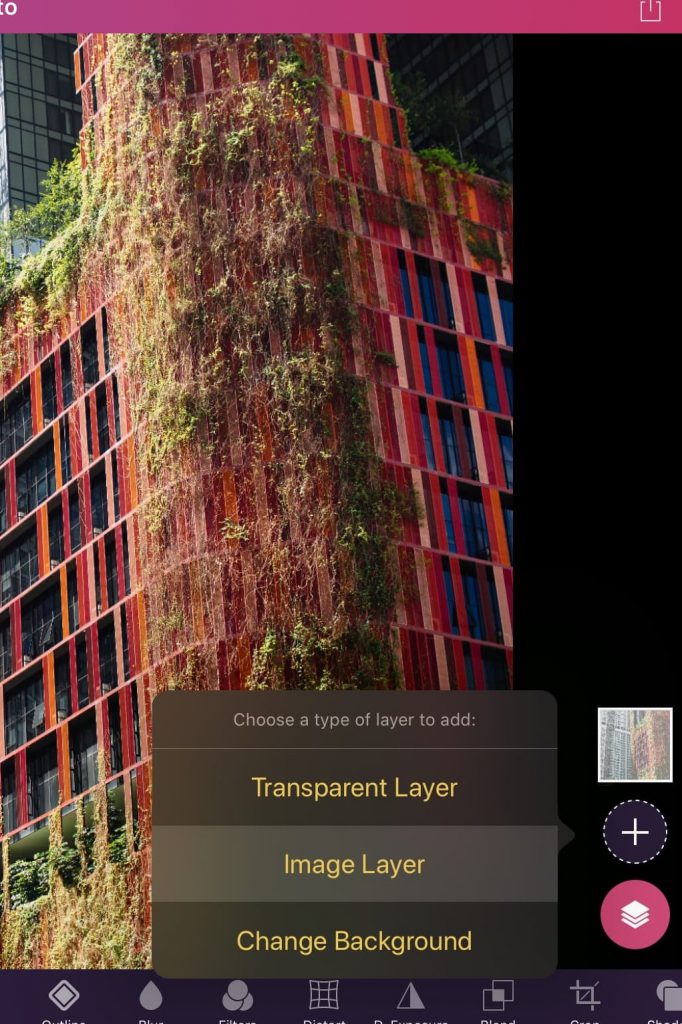
Now that your book is ready, all that it is missing is a hand to hold it. This is not Hogwarts, so books do not float on their own! Tap on the ⊕ icon and select the “Image Layer” option. You will be directed to the stock page where you can easily search for a hand holding a book. A DIY alternative would be to take a photo of someone holding a book and adding the image from your photo gallery.

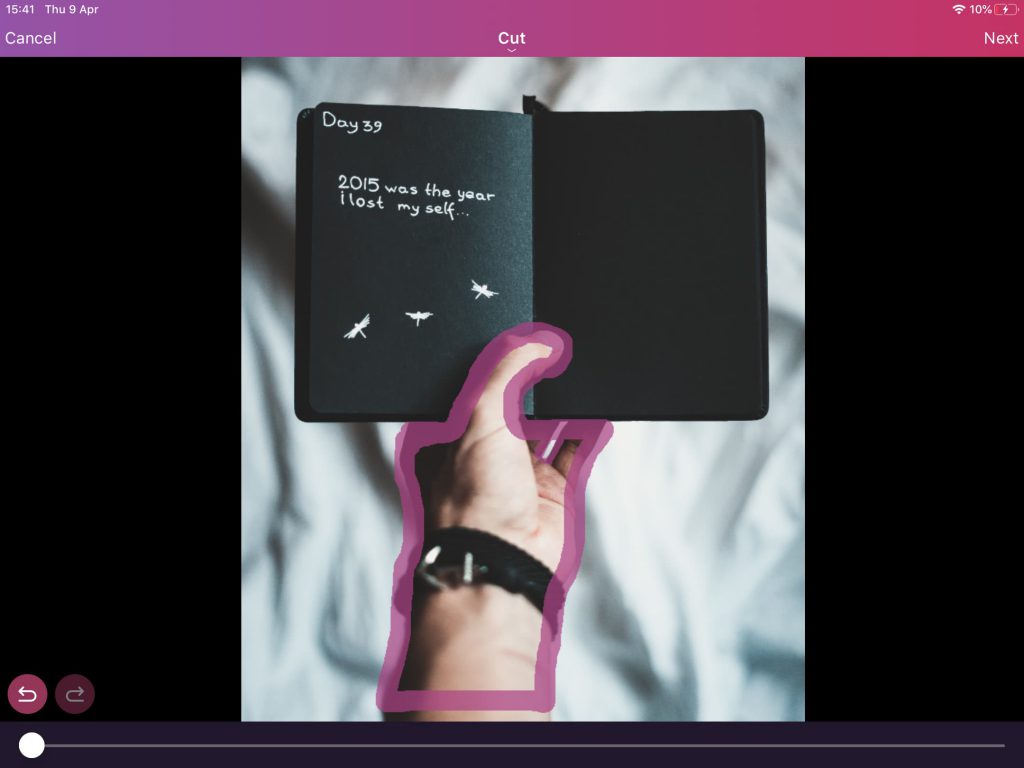
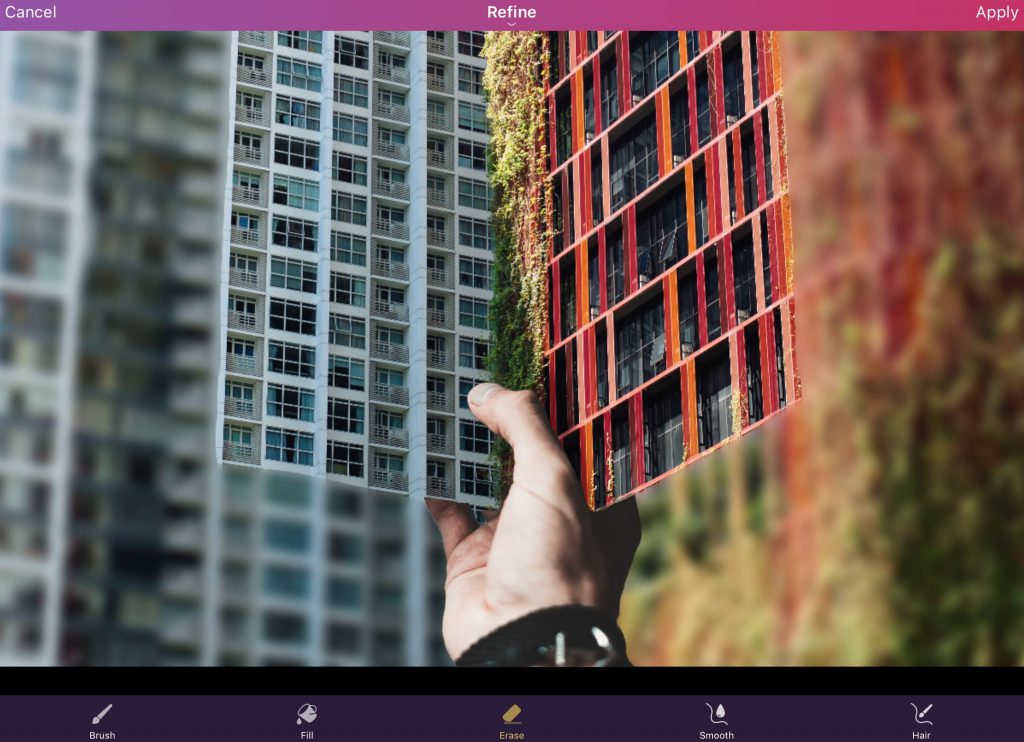
Having the hand shape and book ready, it is time to work on the composition and make the photo look surrealistic. If the hand position and your building angle mismatch, try flipping the hand to match the background. To do this, scroll to the end of the tool menu and tap on the “Flip H” feature. For a seamless merge, Refine the hand by erasing parts to make it seem as though the hand goes behind the book.
There you have it! It is your turn to build a book (pun intended).