Back
Back
 Pixomatic Team
If you already own a channel on YouTube or have been thinking about getting into the industry, then you might already know how much time does it take to create an attention-grabbing thumbnail for your video. Gone are the days when you could get away with awful thumbnails, like PewDiePie or NikkieTutorials at the beginning of their careers. Today, with the development of the YouTube community, having a low-quality thumbnail means that your amazing videos will get lost in the myriad of others. However, editing thumbnails in sophisticated software require significant skills and effort. Besides, it takes a lot of time that you could otherwise spend on improving your content. Pixomatic Pro photo editing app gives you the solution so that you can stop wasting your time. Here are 5 steps that will help you to create a YouTube thumbnail in 2 minutes – directly on your phone:
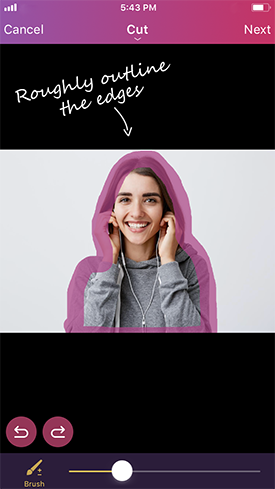
Take a photo of yourself or the object that you would like to see on your thumbnail. Open the Pixomatic Pro photo editor on your iPhone and select the desired photo from your gallery. To make a cutout, select the Cut Tool and roughly outline the edges of the object that you would like to cut. The app will automatically detect the object and make the cutout for yourself. If the cutout didn’t turn out perfect - no worries! You can always go back and make little improvements by using the Refine Tool.
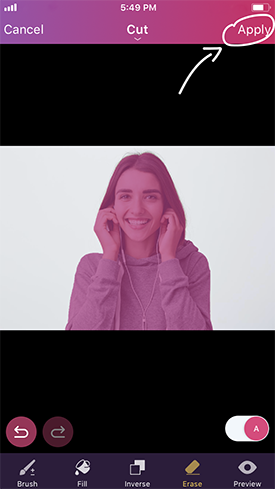
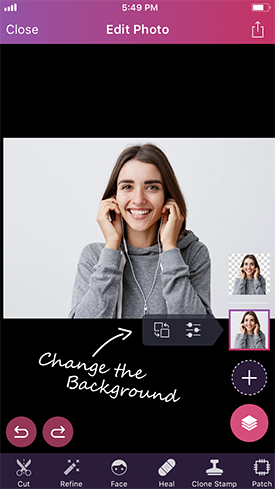
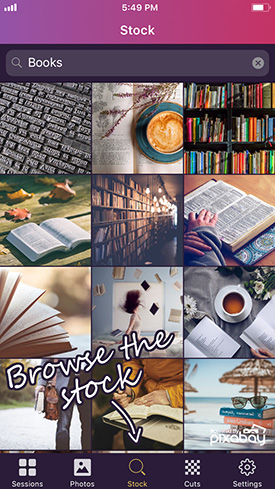
After you have made a cutout, you will see that there are now two layers showing in your Layers panel in the right down corner. Select the background layer from the panel and tap on the Change the background icon. You can then choose a background either from your personal gallery or you can just browse our integrated Pixabay stock image library to find the one you like the most.
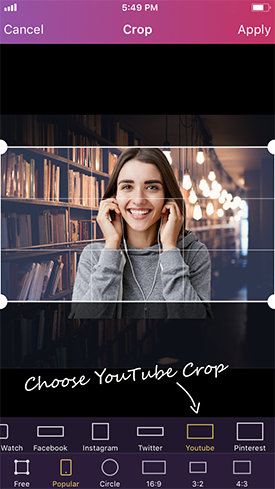
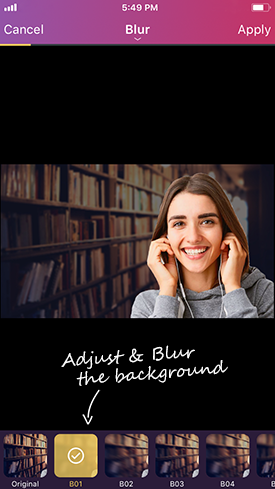
After you are done with the background, you might now want to crop the image to fit the thumbnails size. But wait! Before you even start googling – Pixomatic Pro has popular crop sizes for almost every Social Media platform. Choose the Crop function then Popular sizes, and swipe to the left and find the YouTube thumbnail ratio. You can also adjust the layers, adding more Warmth & Contrast to make the colors pop up. Decrease the Exposure and apply some Blur to the background to make your foreground image to stand out more. Don’t forget to also check out our newest Grain and the HLS tools to add some spice to your thumbnails!
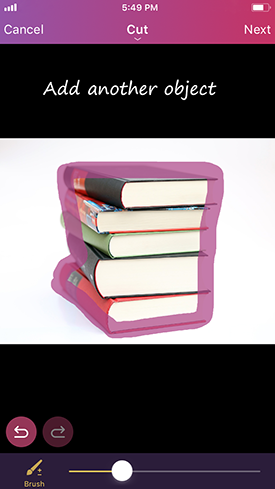
Now is the time for the most fun part – outlining! Simply tap on the cutout and select the Outline Tool – our new revolutionary tool will create that YouTube-style outline for you. You can adjust the size, the color and the alignment of the line. Just play around and find the style you like the most! (Pro Tip: depending on how smooth you want the outline to be, you can apply some Smoothness to the foreground first.) Don’t forget to add some other outlined objects to make your edit more interesting.

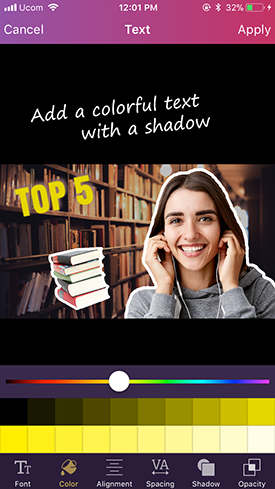
The final step is to add a caption to your thumbnail. Decide on what you would like to include to grab the viewer's’ attention. Then go to the Text tool and choose a font you like the most or learn more about the most used thumbnail fonts in this article. Add some shadow, experiment with the opacity and positioning and make some final touch-ups by changing the color. Finish the editing by tapping Save Image or Save Session in case you would like to access it later on.

Congratulations, your coolest YouTube thumbnail is ready to win those views!